
My Dragonfly – A Recipe for Stress-Free Flying
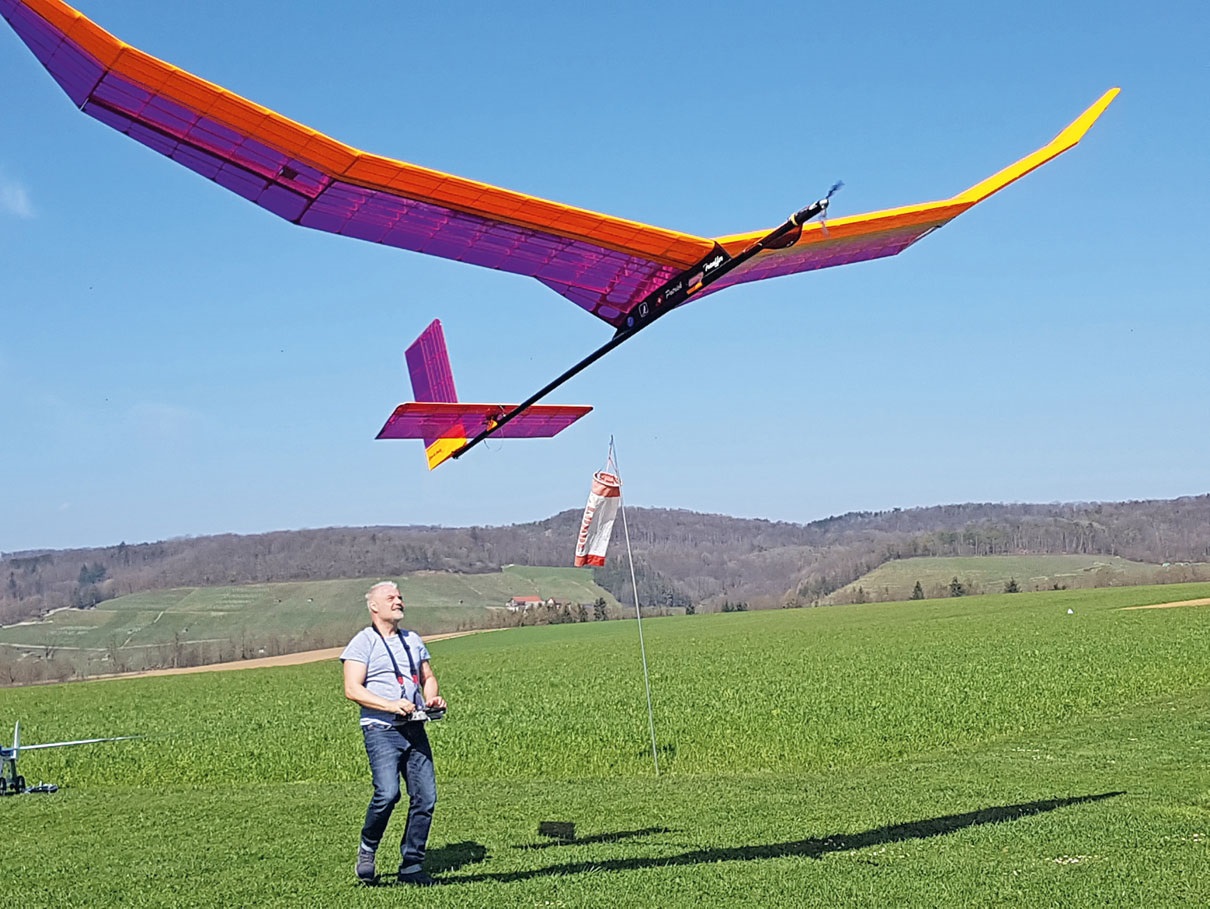
It’s been quite some time since my last project, the Grand Lutin XXXL from September 2019. Now I wanted to build another extraordinary, out-of-the-ordinary model. The goal: to design a model that is as large and lightweight as possible. The plane should be able to be assembled and flown autonomously. To that end, I built a 1:10 scale model. This allowed me to get a good visual sense of its dimensions.
First, I discussed the design with Rolf Fritschi. The glider should fly as slowly as possible, as befits a light-wind glider. To that end, we opted for the Göttingen 227, which met my expectations both visually and aerodynamically. A triple-V shape is designed to provide sufficient inherent stability, eliminating the need for ailerons.
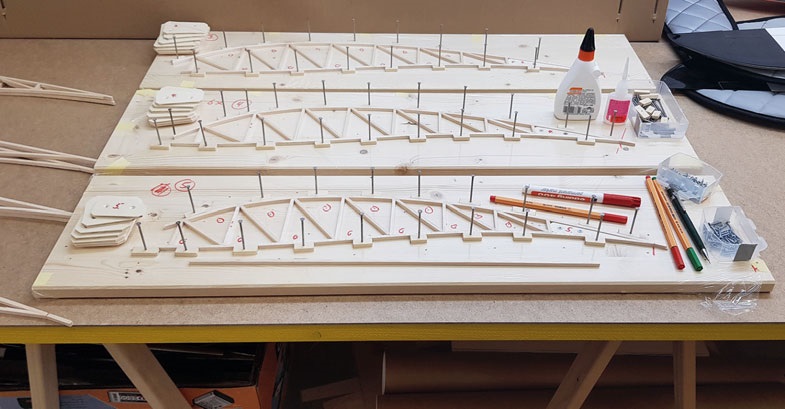
After Rolf had drawn the wing design in CAD, we moved on to milling the nail templates for the ribs.
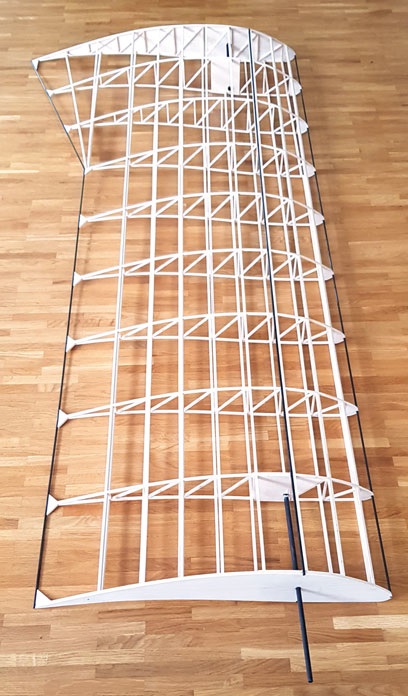
The ribs were made from very lightweight balsa strips measuring 3 × 5 mm. A total of approximately 100 meters of strips were used. A NACA profile was chosen for the high-lift wing and the slanting wing. Both the high-lift wing and the slanting wing were constructed using the block method from 4-mm balsa.
A 3-mm CFRP tube serves as the leading edge. To improve the rudder’s torsional stiffness, I used star-shaped thread instead of nose planking. For weight reasons, I opted not to install full nose planking on the rudders or the wing. As a result, the airfoil accuracy was naturally no longer 100 percent guaranteed, but I was willing to accept that for weight reasons, since the Libelle flies at a snail’s pace anyway. When building the wing, I opted not to use a spar structure, which unfortunately turned out to be a mistake later on.
After all forty ribs were built on the nail jig, I traced the wing geometry and rib spacings onto a sheet of packing paper. I then glued the ribs at right angles to the 3 × 5-mm balsa strips using superglue.
The root ribs of the inner wings were further reinforced with CFRP fabric. A CFRP tube with an outer diameter of 4 mm served as the trailing edge. The main wing spars consist of two CFRP tubes with an outer diameter of 10 mm. For the outer wing spars, I used two CFRP tubes with an outer diameter of 8 mm. At first, I wanted to make the outer third of the wing surface removable as well, but since the root rib warped while I was covering it, I ended up gluing the flaps in place after ironing.
Once the wings were mostly finished, I suddenly felt the urge to add ailerons. Originally, the Libelle was intended to be a two-axis glider, also for weight reasons. So I decided to retrofit the ailerons into the outer wings, which wasn’t exactly easy given the delicate construction.
For the landing flaps, I used two small servos that push the flaps open with the help of a CFRP tube. I initially wanted to attach the wings with magnets, but that wasn’t possible because the magnets were too weak. So I retrofitted everything to be bolted together with M-3 screws. Once all the wing sections were finished, it was time to cover them. At first, I wanted to paint everything purple and white, but luckily my sweetheart Melanie stepped in and argued that everyone has white—I should go with something bright, like bright orange. I really liked the idea, so I decided on that color scheme. In flight, this color scheme turned out to be very beautiful and greatly improved visibility even from a distance—it was awesome.
Now it was time to cover the model. First up were the outer wing tips. I made these from 3 × 3 mm very lightweight balsa, which turned out not to be ideal when covering the model. I used Oracover Light instead of the ultra-light version because it has a more intense color. The result: higher heat during ironing and greater tension in the film caused the ribs to fail under the strain and break. Now I was at a loss.
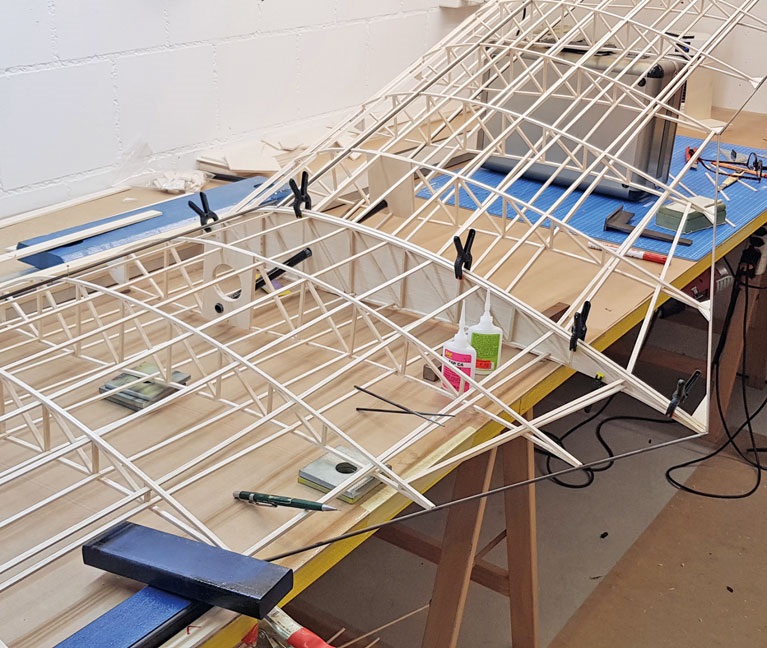
After some thought, I peeled the film off again and repaired the ribs with low-viscosity ZAP superglue, then applied 0.6 mm plywood strips to all the ribs. Since I had now realized just how delicate my construction was, I added various reinforcements to the inner wing sections. As mentioned at the beginning, this wouldn’t work without a main spar. But since the wings were already so far along, I had to retrofit a spar into the finished wing. I did this by filling the space between the ribs with 4-mm balsa. Finally, I glued a strip of 0.6-mm plywood across the entire span of the inner wings, which were drilled with holes for weight-saving purposes.
It took me about 30 hours in total to cover the wings, because everything is very delicate and any mishandling can cause the ribs to break. Since I don’t have full planking in the nose area, every move must be carefully considered. By now, I know exactly which 2–3 spots I can grip the wings and snap them together without causing any damage.
For the fuselage, I initially wanted a very lightweight CFRP tube that was sufficiently rigid at a length of 3.5 meters. The company R&G had a product that was, on the one hand, very expensive and, on the other hand, not light enough. In the meantime, I asked my colleague Markus Spalinger if he had any good ideas in this regard. Markus is responsible for the lettering on my airplanes and is a very skilled model builder who always comes up with excellent details. He was able to help me right away. Markus had a telescoping flagpole from back in the day that was about 8 meters long and had a tapered, interlocking design. I cut off the thickest 3.5-meter section of the flagpole.
First, I made the wing root and wing tip mounts on the fuselage. For the main wing mount, I opted for a so-called “pylon.” This pylon allowed me to easily determine the wing span and angle of attack. The pylon is made of 15-mm balsa and covered with 0.8-mm plywood. For obvious weight-saving reasons, I also drilled holes in it. Another advantage of the pylon was that I could route the servo connection wires from the ailerons and landing flaps through it. To ensure the pylon holds securely to the fuselage tube in the end, I reinforced the joint with a 15-mm CFRP tube.
For the SLW linkage, I used 0.6 mm tether flight wire and a central servo at the front of the fuselage. At first, I wanted to use a Bowden cable for the horizontal tail control, but it had too much play for design and technical reasons. So I decided to mount the servo directly on the fuselage joint next to the horizontal tail. This allowed me to connect the horizontal tail without any play. Finally, I installed the motor. Since I needed quite a bit of lead, I was able to opt for a somewhat heavier motor powered by a 4S battery.
| Wingspan: | 6.80 m |
| Length / Longueur: | 3.50 m |
| Weight / Mass: | 5.5 kg |
| Wing area: | 369.6 dm² |
| Airfoil: | Göttingen 227 |
| Wing loading: | 14.88 g/dm² |
| Motor: | Mega Motor AC22 / 45 / 3E |
| Controller: | Hacker X-70 |
| Airbrake Servos: | d-power DS-140 BB MG |
| HLW Servo / Elevator Servo: | d-power DS-140 BB MG |
| SLW Servo / Rudder Servo: | d-power DS-140 BB MG |
| Receiver: | Jeti Duplex REX 7 |
| Battery: | Hacker Lipo 4500 mAh 4S |
The motor is a Mega-Motor AC 22/45/3 with a 4500 mAh Hacker battery and a Hacker ESC. Once the center of gravity had been determined, nothing stood in the way of the maiden flight.
Since the flying weather in January wasn’t ideal, I had to wait a while before making the maiden flight after completion. On the maiden flight, my brother Dani launched the Libelle. It flew straight away in a gentle, approximately 15-degree climb toward the sun. I was thrilled by its slow-flying characteristics and how well it circled. Ailerons would clearly be unnecessary with this V-shape. After about 10 minutes of flight time without thermals, I landed the Libelle safely right at my feet. The large landing flaps proved to be extremely effective. All in all, this was a particularly successful project for me. The lightweight “Libelle” glider will bring me joy on balmy summer evenings as it flies toward the sunset.


News from HEBU

TEAM MANAGER "THIS" BOSSHARD
 Rodito Nussbaumer

YOU KNOW WHAT I MEAN? 125 YEARS OF THE SWISS AERO CLUB
 Emil Giezendanner

F3A EUROPEAN CHAMPIONSHIPS IN ST-MACAIRE, FRANCE
 Matthias Bosshard

52. 2026 ALPS CUP
Emil Giezendanner
CORSAIR F4U – A WARBIRD WITH A MEMORABLE LOOK
Jürgen Rosenberger, Jürgen Prinz
SUMMER FUN 2026 AT MG USTER
Martin Wunderli
TRY-OUT DAY AT MFV WETTINGEN
Urs Keller
BY YOUTH, FOR YOUTH
Lorena Betschen
ATOM, THE NEW DOUBLE-DECKER FROM CPLR
Matthias Bosshard
SMALL, MODEL-LIKE SAILBOATS
Res Dauwalder
What's New at Leomotion.com

HORIZON HOBBY/LEMACO NEWS: MICRO OV-10 BRONCO 645 MM BY E-FLITE

COUPE DES ALPES – OBSERVE AND LEARN
Rodito Nussbaumer
TWIN TOWN PARTNERSHIP
Wolfgang Voeller
PRIDE AND GOOD IDEAS
 Markus Nussbaumer

EURO CONTEST GLIDER ACRO TOUR AUSTRIA 2026

INSIGHTS INTO THE HISTORY OF SEAPLANES

34th HAHNENMOOS ALPINE MODEL AIRPLANE CAMP
Res Dauwalder
WELCOME, NEW MEMBER!
Andrea Bolliger
FREE FLIGHT IN THE MIDDLE OF SUMMER
Urs Muntwyler
THE PC-21 STORY
Emil Giezendanner
NEWS FROM HEBU
 Julia Bucher

FROM 0 TO 100
Markus Nussbaumer
MEMORIES
Wolfgang Völler
NOS REGION – A HUB FOR ELECTRIC AVIATION
Emil Giezendanner
Have you almost forgotten about aircraft that take off and land vertically?
Emil Giezendanner
DO YOU KNOW WHAT I MEAN IN THE LAND OF SMILES?
Emil Giezendanner