
F-104 Starfighter
Comic-style airplanes have probably become a bit better known here thanks to the animated film *Planes*. But the idea isn’t new; especially in Asia, comics featuring well-known cars and airplanes are hugely popular.
RC model builders interested in this trend can find a variety of RC projects in international modeling forums, some of which even include construction plans. Another variation is what are known as “egg planes.” These are usually very cute plastic models, faithfully modeled after their real-life counterparts—but their proportions resemble an egg (hence the name). In reality, however, they’re hardly airworthy.
“It all started as a fun project shared by a handful of friends—and that’s still the case today,” explains Stephan, one of the originators of this idea. The first sketches were drawn on a beer mat, the ideas were brought to life in basements at home, and now an entire lineup of unique Fatty models has been created. Most of these creative minds are part of the DIY model-building scene and are well-versed in the design of model airplanes.
Now, numerous construction plans and partial kits are available to everyone at Scale-Parkflyer.de. The small models fly surprisingly well, but it’s inevitable that aerodynamics isn’t the top priority in the design specifications. Visually, they’re all very well done, and every model is sure to make a strong impression.
Aircraft with distinctive, characteristic shapes are best suited for conversion into a “Fatty.” This inevitably leads us to the warbirds. Despite their original military purpose, these aircraft have also become legends of aviation. The most famous ones—such as the P-51 Mustang, the Corsair with its swept-back wings, and the P-40 Warhawk—were the first to be built as “Fatty” models and essentially form the origin of the Legendary Fat Fighters.
The Starfatter—as the “Fatty” variant of the Lockheed F-104 is called—was designed by Mathias Jasinski. Long infected by the “Fatty” bug and plagued by sleepless nights, he wanted to use this model to mark his entry into the jet age. He has documented the build and the first flight tests in detail, with text and photos, on the RC-Network forum. The videos of the first test flights are worth watching and provide plenty of entertainment.
The model is not officially available. Nevertheless, in response to numerous requests, Mathias produced a small batch of parts kits and expanded the circle of test pilots. He later supplemented the CNC-cut Depron parts with deep-drawn molded parts. The side air intakes, the canopy, and the wing tanks were all created in his home oven with a great deal of dedication and a DIY deep-drawing box. →
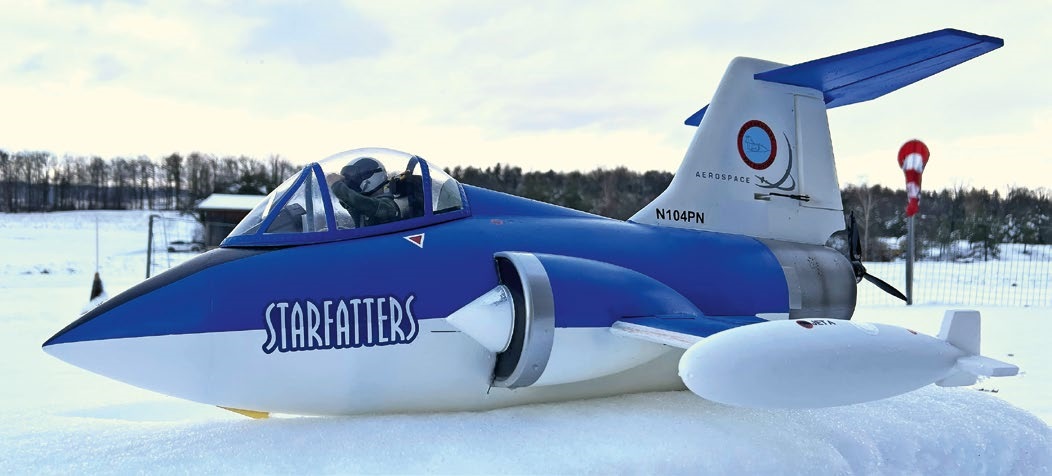
The fuselage is constructed in the traditional manner with frames and longitudinal stringers made of 6-mm Depron and is planked with 3-mm Depron. The tail assembly consists of just a few parts. The joints fit together perfectly. In no time at all, all the parts are assembled into a skeleton that holds itself together. Using a construction jig as a guide, the parts were glued together with low-viscosity superglue. Some touch-up work on the contour of the frames is necessary to ensure that the subsequent skin fits properly.
The wing has a KfM-2 airfoil and consists of two 6-mm Depron sheets each, plus an embedded 6×1-mm CFRP rod serving as the spar. The KfM profiles are ideally suited for such panel constructions. According to theory, they are comparable to a conventional wing profile at slow flight speeds.
The skin installation is the most time-consuming part of these models. The panels must be individually adjusted to fit the contour. If a panel simply won’t fit, use transparent parchment paper to trace the outline of the panel directly onto the model. It’s best to proceed in small steps (from frame to frame). I use UHU POR for gluing, since it can be easily removed with mineral spirits should a panel not fit as desired. This is painstaking work that we’re no longer used to these days, given the abundance of ready-to-fly models. The sense of satisfaction is all the greater, then, when a sturdy, streamlined cylinder lies complete in the builder’s hands.
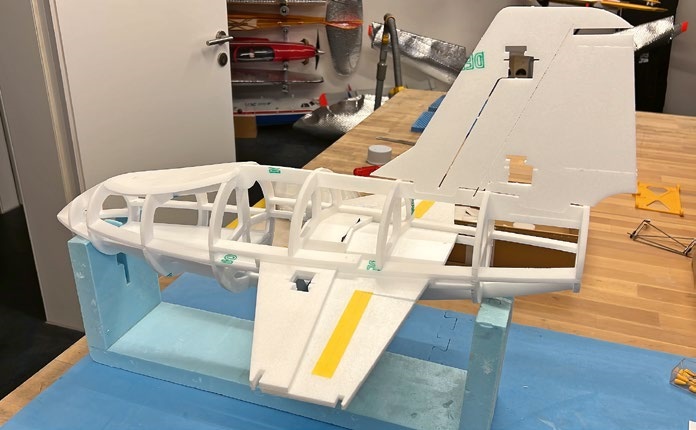
I’ve been building with Depron for quite some time now, and I often get surprised looks when I explain that the curved surfaces on my models are made of bent Depron. So here’s a quick explanation: Depron has a preferred bending direction, which is at a 90° angle to the printed markings.
You should take the intended bending direction into account as early as the cutting stage. Afterward, with the slightly shinier side of the Depron facing outward, carefully pull the parts to be bent with the flat of your hand—for example, over a rounded edge, a cardboard tube, or something similar. The size of the roll determines the bending radius. For very sharp curves, work your way toward the desired shape using small, gentle bending motions. The parts in the cockpit area are bent in two directions. It takes a bit of practice and patience to shape the part into a concave form. If something does go wrong or if it takes several attempts to get it right, no problem—a new part can be quickly cut out.
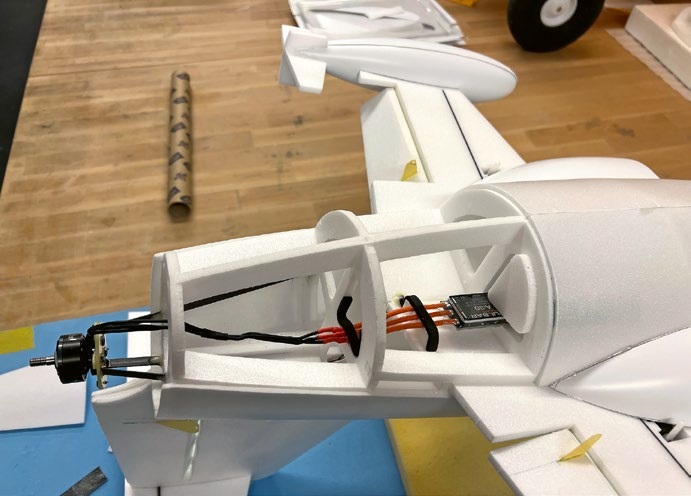
In the end, the model has only one access point via the canopy. Before fully covering the airframe, the motor was installed and the battery mount was positioned so that trim weights would be unnecessary later on. I drew on the experience of my colleagues. An F-60 PRO IV with a 2550 kV motor from T-Motor and a 5×5.1 three-blade propeller was installed as a pusher configuration. The motor bulkhead sits at the rear on three CFRP rods and is glued in place with lateral tension and the motor tilted upward. The maximum current is just under 30 A. For those wondering if an impeller could be installed: Yes, this has since been done as well; you can find more on this in the RC-Network forum.
Perhaps a bit too optimistic, I initially installed only a 30-A ESC. During the maiden flight—despite winter temperatures—it was nearly burned out. I’ve since replaced it with a 40-A ESC. The Starfatter is controlled via elevator, ailerons, and rudder using standard 7-g servos. For this, I treated myself to a receiver with an Assist function. Having witnessed various hair-raising maneuvers firsthand, I came to the conclusion that electronic damping certainly wouldn’t hurt this little model.
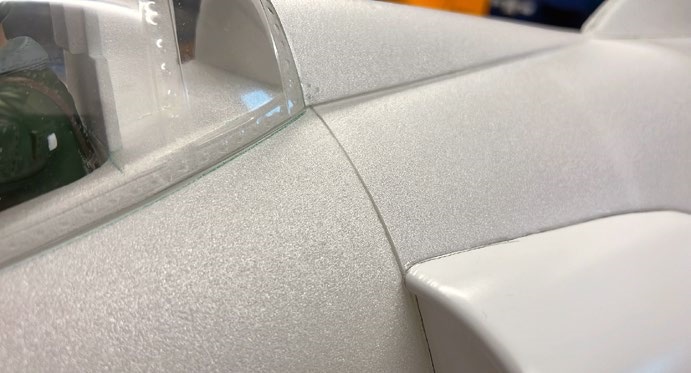
Depron is easy to sand. The nose of the Starfatter definitely needed a little tweaking. Where necessary, I filled in the gaps with putty. I use “Molto Champion” (for interior use) from the hardware store. I deliberately didn’t completely smooth out the joints in the planking; this creates realistic panel lines. →
The only problem with sanding Depron is that, after painting, the difference between sanded and unsanded areas becomes quite visible. Here are three practical solutions:
1. Sand and fill sparingly. This requires precise construction and a clean, soft work surface to avoid dents, scratches, and bumps that can occur during assembly as much as possible.
2. “Parquet finish”—Coat the sanded model entirely or partially with traditional covering paper and parquet varnish. This makes even the sanded surface uniformly smooth and, depending on the thickness of the layer, more durable.
3. “Two-Meter Rule” – Forget about the beautiful surface; you won’t be able to see it from two meters away anyway 😊 I usually end up going with the approach
4. On the Starfatter, I applied the parquet finish to the nose and the underside, since it doesn’t have a landing gear.
I applied the finish using spray cans (solvent-free) and an airbrush. I also achieved good results on Depron with foam brushes or rollers. I’m no airbrush pro, but small models like these are actually perfect for practicing and/or experimenting with the technique on a manageable scale. Why not give weathering a try? Testing it on a large, expensive scale model requires considerably more courage.
I opted for a civilian version of the F-104. The original Starfighters are housed at the Kennedy Space Center in Florida. From there, a small fleet of these former supersonic fighters is now used for scientific and commercial purposes. I like the pseudo-scale look of the “Fatties” best. Visually inspired by the original—yet it remains a caricature of it. That’s why I also removed the cockpit, even though adding this pilot figure added quite a bit of extra weight. In the end, I cut out a few simple decals and stickers using the plotter. By the way: On most Fatty models, it’s precisely these funny details that are the icing on the cake.
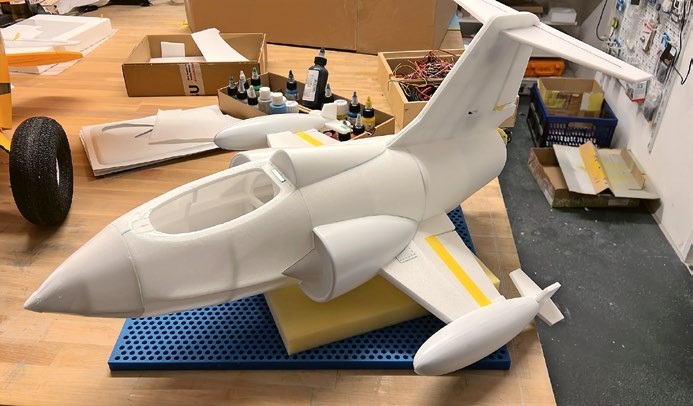
In a nutshell, the Starfatter’s flight characteristics could be described as true to the original. Many may have already heard of the original’s notorious reputation. The Starfatter lives up to this reputation—its slow-flight envelope is rather narrow. As is well known, brushless motors allow for vertical flight these days, but the rule still holds: a lighter build flies better! If the model is built to weigh less than 200 g, it can be flown indoors without any problems. This was impressively demonstrated at the model building fair in Friedrichshafen—though how to build it that lightly is a whole other story.
Including the 3S 1800 battery, my takeoff weight is 680 g. You need to accelerate it during takeoff so that sufficient lift is generated quickly and the controls can take effect. If the model veers off to the side at low speed, it’s impossible to correct it. Ground launches work best on short-cut grass or snow. If you try to launch the model too early, it usually ends up in an uncontrollable flight state. For a hand launch, it’s best to enlist an experienced launcher, or you can use a small rubber band to help launch it. (I do have one reservation, though—I haven’t tried it yet.)
I deliberately waited for snow for my first flight. I was able to accelerate straight ahead without any problems and take off safely by pulling gently. Once in the air, the Starfatter flies like it’s on rails, even without a gyro. Its silhouette is small; you shouldn’t fly too far away. Gliding landings don’t work with the Fatties. Under no circumstances should you cut the throttle too early and then try to make a smooth landing—instead, fly down to the ground in a controlled manner with reduced thrust.
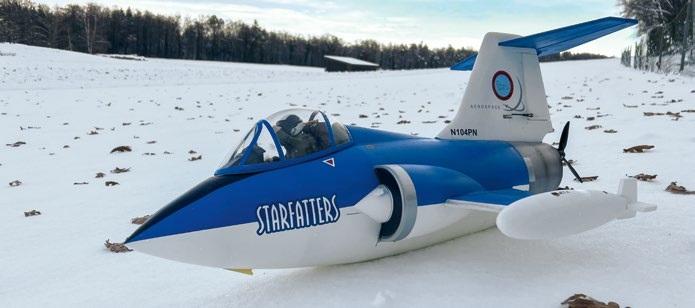
Even though it might not seem like it at first glance—the Starfatter is more than just a novelty model. Experience with model building would certainly be an advantage. But you can also just give it a try; the cost of materials is reasonable.
The Starfatter is an extraordinary model that doesn’t stand out for its record-breaking performance. Its shape grew out of a whimsical idea that was brought to life with plenty of creativity and classic building techniques. Like the original, the Starfatter can react quite harshly to incorrect movements of the control stick. It has caused its designer, Mathias, more than a few wrinkles of worry.
And yet—one thing I can assure you for certain: If you successfully get the Starfatter airborne, it won’t just put a grin on your face as the pilot. Before you know it, you’ll find yourself thinking that you could quickly build another Fatty...
Kit and plans for other Fatty models:
www.scale-parkflyer.de
Video of a “Starfatter”:
Starfatter on the RC-Network forum:



News from HEBU

TEAM MANAGER "THIS" BOSSHARD
 Rodito Nussbaumer

SUMMER FUN 2026 AT MG USTER
Martin Wunderli
BY YOUTH, FOR YOUTH
Lorena Betschen
SMALL, MODEL-LIKE SAILBOATS
Res Dauwalder
TRY-OUT DAY AT MFV WETTINGEN
Urs Keller
What's New at Leomotion.com

52. 2026 ALPS CUP
 Emil Giezendanner

ATOM, THE NEW DOUBLE-DECKER FROM CPLR
 Matthias Bosshard

INSIGHTS INTO THE HISTORY OF SEAPLANES

YOU KNOW WHAT I MEAN? 125 YEARS OF THE SWISS AERO CLUB
Emil Giezendanner
34th HAHNENMOOS ALPINE MODEL AIRPLANE CAMP
Res Dauwalder
CORSAIR F4U – A WARBIRD WITH A MEMORABLE LOOK
Jürgen Rosenberger, Jürgen Prinz
F3A EUROPEAN CHAMPIONSHIPS IN ST-MACAIRE, FRANCE
Matthias Bosshard
HORIZON HOBBY/LEMACO NEWS: MICRO OV-10 BRONCO 645 MM BY E-FLITE

PRIDE AND GOOD IDEAS
 Markus Nussbaumer

EURO CONTEST GLIDER ACRO TOUR AUSTRIA 2026

FREE FLIGHT IN THE MIDDLE OF SUMMER
Urs Muntwyler
THE PC-21 STORY
Emil Giezendanner
TWIN TOWN PARTNERSHIP
Wolfgang Voeller
WELCOME, NEW MEMBER!
Andrea Bolliger
COUPE DES ALPES – OBSERVE AND LEARN
Rodito Nussbaumer
NEWS FROM HEBU
 Julia Bucher

FROM 0 TO 100
Markus Nussbaumer
MEMORIES
Wolfgang Völler
NOS REGION – A HUB FOR ELECTRIC AVIATION
Emil Giezendanner
Have you almost forgotten about aircraft that take off and land vertically?
Emil Giezendanner
70 YEARS OF THE NIDWALDEN MODEL AIRPLANE CLUB
Martin Barmettler