
Flying Cartoon
Magnum Reloaded Build Report by miniprop
I first saw the Magnum Reloaded about two years ago as a model kit and was immediately reminded of the cartoons from my childhood. But since I consider myself more of a “woodworker,” I couldn’t quite get on board with the building process—including cutting EPP and so on. Still, I just couldn’t get that little “plane” out of my head, and so the idea arose to build the Magnum out of wood. Until… well, until I saw the ad from “Himmlisches Höllein” for the “Magnum Reloaded” as a kit at the end of last year. And since the little plane was also meant to fly on water—and foam works better with water than wood—it ended up becoming an EPP plane after all.
I received the kit for the model: a brushless motor — the Nanno 15 g from Pichler, a Prop-Saver motor mount, the GWS Slow-Fly 8×4.3 propeller, two Robbe Eco 4.3 g servos, and the float kit. Everything arrived well-packaged and in good condition. In addition, I added 1 meter of 1×6 mm CFRP flat rod, two linkage connectors, and the batteries—2S LiPo with 450 mAh—from my own stash. And let’s not forget—of course—the right pilot, but more on that later.
So now it’s time to “roll up our sleeves” and get started on this major project! To glue the EPP, I used hot glue (preferably a type that remains elastic) and Uhu-Por. For the small parts, you’ll also need some superglue. Based on my building experience, I’d use even more Uhu-Por on the second model. It stays more flexible, and that’s an advantage not to be underestimated when working with EPP, which is also very flexible. Of course, hot glue is easier and faster to work with, but both methods work.
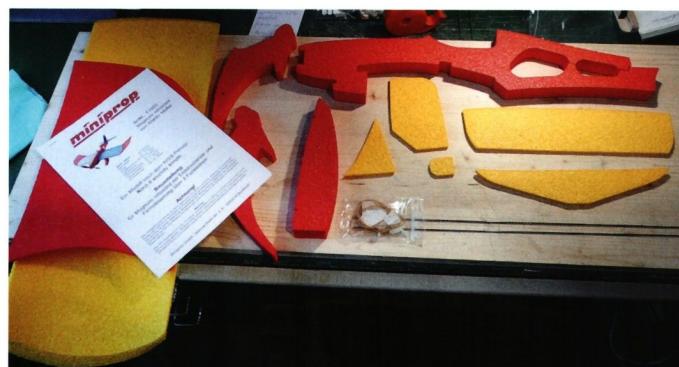
First, we inspected everything and—as we always do “by the book”—studied the instructions ;). In this case, with only seven A4 pages of text and plans—two of which familiarize us with potential hazards—this didn’t take too much time. The term “Kiss principle,” which was prominently featured in the instructions, gave us pause. Unfortunately, this isn’t—as we initially suspected—a reference to Grimm’s fairy tale “The Frog Prince.” And we can give this construction set a big
Just press “Schmatz”—and presto!—there’s the finished model right in front of us. No, it actually stands for “Keep it stupidly simple.” Loosely translated: “foolproof kit”—and that certainly puts some pressure on the builder! After all, who wants to come across as an idiot if something goes wrong during assembly?
Looking ahead, it’s safe to say that this kit is intended more for “idiots” with a bit of experience—sorry—model builders. An absolute beginner is likely to have quite a few questions, especially given the rather sparse instructions.
But let’s get back to the building process—I’ve started by painting the engine nacelle to make it a bit more water-resistant. While the engine nacelle is drying, we’ll begin finishing the wing.
First, the CFRP flat rod was glued to the wingtip spar using Uhu-Por to stiffen the wing. Next, the landing gear legs were measured and attached, and finally, the ears were glued to the wing tips.
From my perspective, I highly recommend reinforcing the wing with a CFRP flat rod. It certainly makes sense, especially if you want to do a little “tinkering” with the model.
The wing was then set aside for the time being, and I moved on to the fuselage. I recommend installing the motor first and making room for the ESC in the fuselage. These tasks are much easier to accomplish as long as the tail assembly isn’t mounted and isn’t getting in the way. So I prepared the motor and extended the motor leads. Next, I drilled the holes for the motor mount and cable grommet on the frame and mounted the motor on the frame. Before gluing the frame in place, I had to use a hot metal rod to melt a cable channel from the motor to the ESC and create space for the ESC.
At this point, a few words about the placement of the RC components. The diagram and instructions aren’t very helpful in this regard. Although the layout is shown on the diagram, it’s up to the builder to figure out how to implement it. So I thought the whole thing through again, because my goal was to position the receiver and ESC in such a way that they are protected from water yet still accessible in an emergency without damaging the model. Ultimately, a cavity was created at the top of the fuel tank, below the servos, where the receiver and servo cables fit comfortably.
For the ESC, I created a recess at the front edge of the filler block in the main fuselage. The wing itself was glued in place and
A grommet was installed for the servo cables. A slit was then cut into the filler block with a utility knife to route the controller cable. The filler block was secured to the front and rear fuselage stops with a small amount of Uhu-Por. This way, it can be easily removed again with a little pure gasoline or a utility knife, ensuring access to the RC components. The servos are mounted in the designated recess in the center of the fuselage.
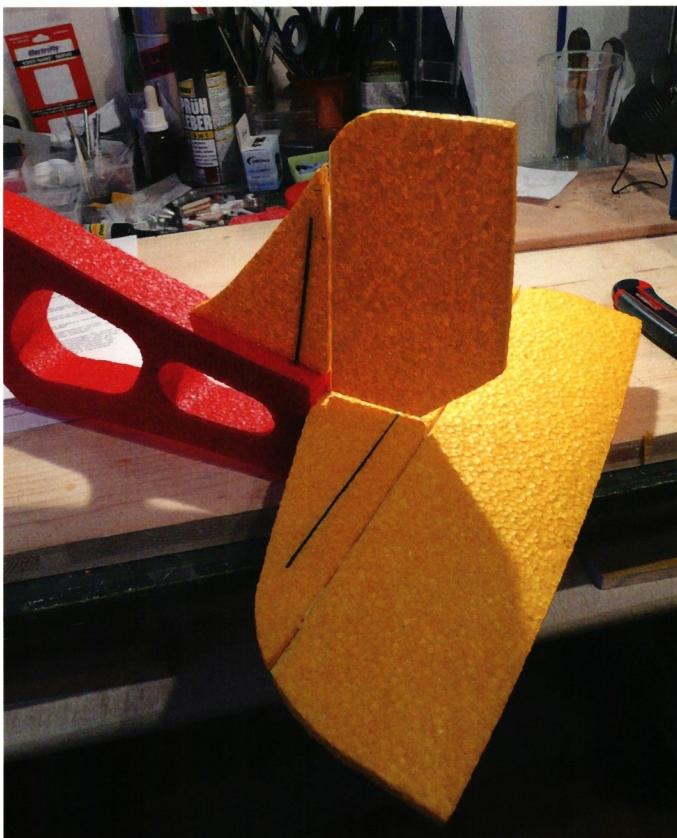
Now that the motor has been installed and the RC components are in place, the two cutouts in the rear fuselage section were glued shut. Next up is the assembly of the tail unit. Here, a CFRP rod has also been incorporated into the rudder damper panel, protruding about 2 cm at the bottom. This provides greater stability for the rudder and ensures the damper panel is more securely held in the fuselage.
Similarly, a CFRP rod was also incorporated into the elevator damping surface for reinforcement. After that, the control surfaces are attached using the flexible hinges and a small amount of superglue, and the tail unit is aligned and glued to the fuselage. The control linkages for the control surfaces were assembled using the included parts. The only exception is that I used linkage connectors on the servo side. This makes it easier to adjust the control surfaces. To ensure clean linkage for the rudder, some EPP had to be removed from the upper edge of the fuselage in the area of the rudder linkage. For non-water-based models, all that’s left to do now is glue on the windshield and install the propeller. For water-based models, however, you’ll still need to assemble the floats.
The floats are shipped separately and, in addition to a few parts, include their own assembly instructions. The assembly
| Manufacturer: | miniprop |
| Wingspan: | approx. 800 mm |
| Length: | approx. 700 mm |
| Takeoff weight from: | 240 g |
| Wing area: | approx. 13.8 dm² |
| Wing loading: | approx. 17.5 g/dm² |
| Control: | SR HR motor |
| Cover: | www.modellbau-zentral.ch |
The assembly here is really simple. You can’t really swap parts around, since the four side panels and the two center pieces are all identical. So, glue two side panels together with one center piece each, as shown in the diagram. Next, cut the four CFRP rods to length to secure the floats and install them as shown in the diagram. To protect the floats for winter use on snow and ice and to improve their gliding performance on the water, I sealed the underside of the floats up to the waterline with water-dilutable stair and hardwood floor varnish. Attaching and removing the floats is very easy and takes just a few seconds
. Just snap on the floats, hook the rubber rings in place to secure them, and you’re done! It is not necessary to adjust the center of gravity when flying with or without floats.
The center of gravity and control surface deflections were taken from the assembly instructions and are perfectly fine for the first flight. As for the control surface deflections, however, you can simply go all out—there’s really no such thing as “too much” here. The behavior regarding the center of gravity is also not critical and allows for some leeway. To achieve the correct center of gravity on my model, despite the plate being mounted right at the front of the frame—
With the specified battery, there's still about 10 g of lead in the nose. So the motor can weigh a few grams more, or the battery can be a little bigger.
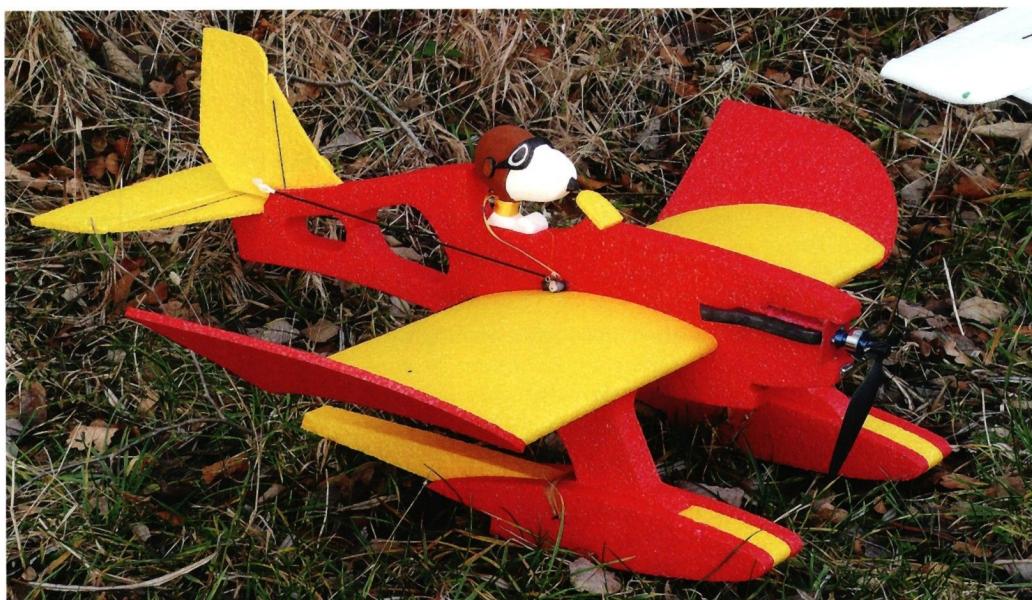
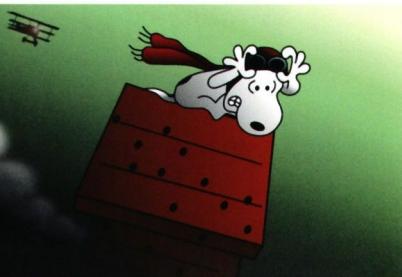
So come on, let's go flying... Wait, isn't something missing? The pilot, of course! You absolutely can't fly this model without one! And who better for the job than "Snoopy," the beagle from Charles M. Schulz's Peanuts cartoons. By the way, these are cartoons that even “adults” can enjoy reading again and that contain plenty of amusing and enlightening moments. And anyone who does just that—reads Peanuts—knows that Snoopy has survived more than a few aerial battles with the Red Baron, and that should be enough to qualify him as a pilot for my purposes.
It soon became clear that a suitable Snoopy pilot figure wouldn’t be available for purchase. But what are we model builders, after all, if not a talented and creative “little bunch”? We’ll just make something like that ourselves! To do this, I searched the internet for a suitable side view of Snoopy and then printed it out at the right size. I glued this printout onto a piece of cardboard and then attached that to a second piece of cardboard with adhesive tape. Then I just cut the whole thing out, and the cutting templates were ready. Next, I cut seven rectangles from 6 mm Depron—slightly larger than the cutting templates—and glued them together into a block using diluted Uhu-Por. I then used adhesive to attach the cutting templates parallel to each other on opposite sides of the Depron block. Once the hot-wire cutter has warmed up, you can trace the contours of the template, and the whole thing is slowly starting to look like Snoopy. This rough shape is then shaped into its final form using a sanding block and sandpaper. Ear flaps and aviator goggles were then cut from 3 mm Depron and glued onto the Snoopy figure. Our pilot gets his final touch of color with water-soluble acrylic paints and Edding markers. Finally, there’s a matching scarf—the fluttering...
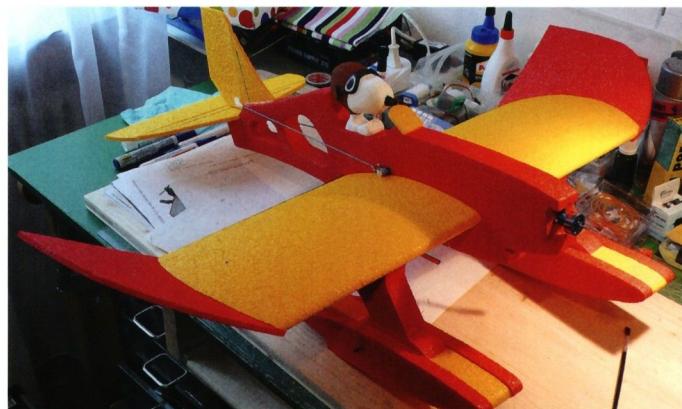
It looks so nice in the wind, and there’s a small CFRP rod on the underside of the pilot so it can be securely glued in place at his workstation. That might sound a bit time-consuming, but it’s something you can easily do on a rainy Sunday—and it’s fun! The pilot you end up with is truly one-of-a-kind and looks really great in his vehicle!
During the final review of the project, I came up with the idea of adding an exhaust system as a decorative element. I simply sketched it by hand on a sheet of paper and then transferred it to a piece of Depron using adhesive tape. I then cut out the entire piece twice with a sharp knife, sanded it into shape, and painted it with a black Edding marker. I secured the exhaust system in place with a bit of Uhu-Por—I love how it turned out!
But now let's go fly! As you'd expect, it's no big deal, but it's really fun! Although it’s “only” equipped with elevator and ailerons, the model is very agile, and you can get up to all sorts of “silliness” with it. Stall? What’s that? It doesn’t really happen here—you can practically land this little guy while it’s standing still. Takeoff is incredibly simple, too: Hold it by the top of the fuselage, give it some throttle, let go—and it flies. Ground launches work just fine, even though the model doesn’t have wheels. You’ll need about one to two meters of space to let it glide, though—so no knee-high grass. You can fly it on land, over water, on snow, or on ice—in other words, any time of year. And there’s usually plenty of space to store this little guy. It’s the kind of model you’ll always want to have with you—one that’s just plain fun and is guaranteed to be a favorite among women and kids: “It’s really cute.”
Patrick Limacher


TEAM MANAGER "THIS" BOSSHARD
 Rodito Nussbaumer

F3A EUROPEAN CHAMPIONSHIPS IN ST-MACAIRE, FRANCE
 Matthias Bosshard

News from HEBU

YOU KNOW WHAT I MEAN? 125 YEARS OF THE SWISS AERO CLUB
 Emil Giezendanner

SUMMER FUN 2026 AT MG USTER
Martin Wunderli
TRY-OUT DAY AT MFV WETTINGEN
Urs Keller
52. 2026 ALPS CUP
Emil Giezendanner
BY YOUTH, FOR YOUTH
Lorena Betschen
ATOM, THE NEW DOUBLE-DECKER FROM CPLR
Matthias Bosshard
CORSAIR F4U – A WARBIRD WITH A MEMORABLE LOOK
Jürgen Rosenberger, Jürgen Prinz
SMALL, MODEL-LIKE SAILBOATS
Res Dauwalder
What's New at Leomotion.com

TWIN TOWN PARTNERSHIP
Wolfgang Voeller
EURO CONTEST GLIDER ACRO TOUR AUSTRIA 2026

INSIGHTS INTO THE HISTORY OF SEAPLANES

34th HAHNENMOOS ALPINE MODEL AIRPLANE CAMP
Res Dauwalder
HORIZON HOBBY/LEMACO NEWS: MICRO OV-10 BRONCO 645 MM BY E-FLITE

COUPE DES ALPES – OBSERVE AND LEARN
Rodito Nussbaumer
PRIDE AND GOOD IDEAS
 Markus Nussbaumer

FREE FLIGHT IN THE MIDDLE OF SUMMER
Urs Muntwyler
THE PC-21 STORY
Emil Giezendanner
WELCOME, NEW MEMBER!
Andrea Bolliger
NEWS FROM HEBU
 Julia Bucher

FROM 0 TO 100
Markus Nussbaumer
MEMORIES
Wolfgang Völler
NOS REGION – A HUB FOR ELECTRIC AVIATION
Emil Giezendanner
Have you almost forgotten about aircraft that take off and land vertically?
Emil Giezendanner
70 YEARS OF THE NIDWALDEN MODEL AIRPLANE CLUB
Martin Barmettler