
Fieseler Storch
More and more beautiful model kits are enriching the world of model aviation
Last summer, I watched the original Fieseler Storch, which had been sitting idle for years, glide over the runway at what felt like a snail’s pace, and I decided to build a model of that plane. So an announcement from Pichler that they would be offering a Fi 156 Storch came at just the right time.
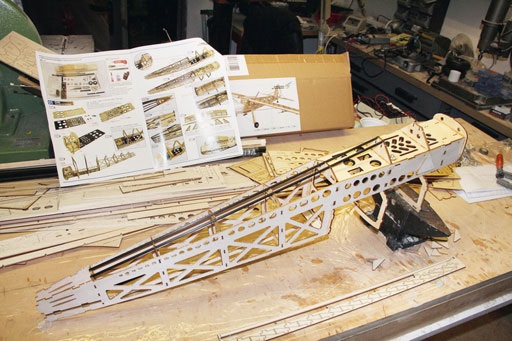
No sooner had I ordered it than it was delivered. A first look inside the kit: from the laser-cut wooden parts down to the tiniest screw, everything is there—nothing else needs to be purchased. My criticism from earlier articles—that manufacturers neglect assembly instructions or don’t include them at all—doesn’t apply here: Across 12 chapters, the assembly steps are numbered sequentially, illustrated with color photos, and explained in concise terms so that even beginners can follow along.
We start with the fuselage base plate; a pre-fabricated aluminum part is mounted onto a wooden panel, and a cube-shaped structure is formed toward the front, into which the engine cowling will later be inserted. Next, we position the right side panel. It is stabilized with frames 4–10—following the photos. Precision-laser-cut individual parts, with a perfect fit, allow a Lego-style fuselage framework to be assembled in no time. A little white glue in the joints, snap them together, wait a bit, and you’re done. A word of advice for superglue purists: The laser leaves scorch marks at the cut edges that superglue can barely penetrate, whereas white glue creates reliable bonds. Once all the frames are assembled, the fuselage framework is reinforced with carbon fiber strips.
Let’s turn our attention to the fuselage cockpit; along with the landing gear, it’s a hallmark feature of the Storch. The very delicate window frames already have 1-mm holes drilled into them; later—after the paint job is complete—you’ll insert “glass windows” cut to size using tiny screws.
Next on the agenda is the construction of the wings and tail surfaces.
In keeping with the spirit of the times, Dr. Fieseler chose a wing break close to the fuselage for the Storch. This creates inner wing stubs to which the outer wings will later be attached. The center section of the outer wing’s main spar consists of a wooden core, which is reinforced with CFRP strips on the top and bottom and fastened with pins according to a 1:1 construction plan. We install the ribs one by one, working simultaneously on the right and left wing halves. Departing from the construction instructions, I will later glue the finished outer wings securely to the stubs. Let’s turn our attention to the flaps—six in total. Wedges and strips are glued to the respective base board, and then the upper skin is pulled over. At the end of half a day of building, two wings and six flaps adorn the workshop table at home.
In no time at all, the tail surfaces—which are largely pre-cut—can be assembled, glued, and lightly sanded. The horizontal and vertical stabilizers are glued into the fuselage. The control surfaces are attached later, after covering and painting, using fiberglass flex hinges—this time secured with superglue. The wings are assembled using carbon-fiber tubes, and aluminum struts are screwed into place to stabilize the wings for flight. The characteristic Storch landing gear has no suspension on this lightweight little plane—unlike on larger models. A guide strut is screwed to the fuselage, 2
| Wingspan: | 1600 mm |
| Length: | 1,000 mm |
| Takeoff weight: | 1.6 kg |
| Servos (8x): | Mini Servo Master S2112 on elevator, ailerons, rudder, landing flaps, and leading-edge flaps |
| ESC: | XQ 30 with programming card |
| Motor: | C 3057, 600-watt outrunner motor |
| Propeller: | 10x6 inches |
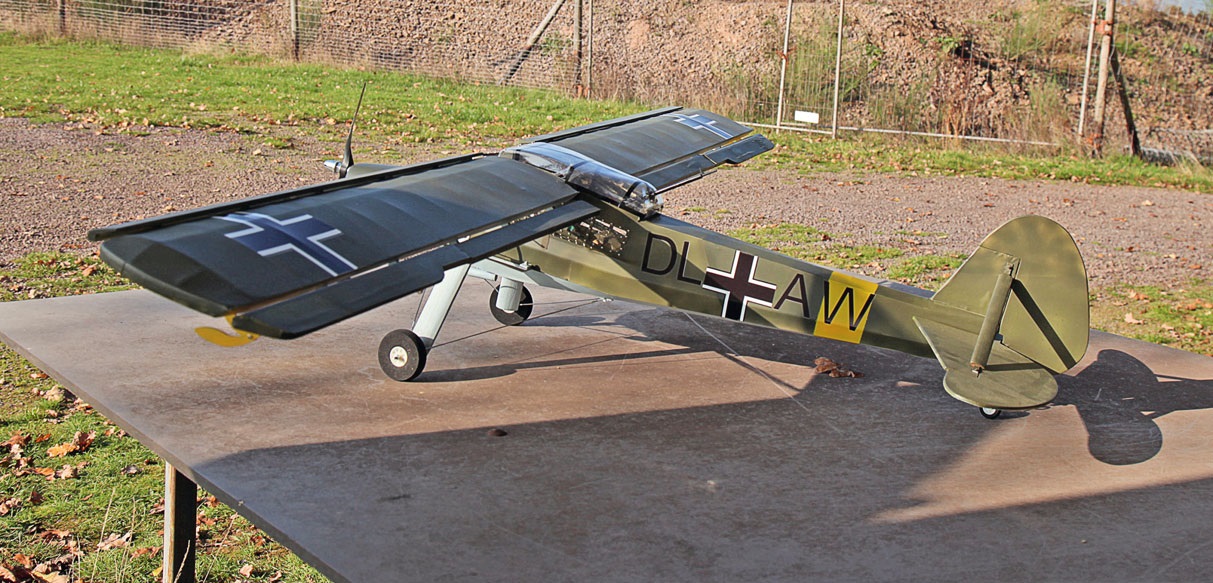
The wires are tensioned on the underside.
The first point of contention arises during rudder assembly. Although the linkages for the ailerons, landing flaps, and leading-edge flaps are modeled after the original, a design flaw has crept in—apparently unnoticed by the designer. On the wing side, the control surface hinges consist of curved brackets that are to be connected via screws to arms extending toward them from the direction of the flaps. Separate from these, the control surface horns are located elsewhere
Installed and connected to the servos. No sooner said than done—everything is connected, the system is turned on, but nothing moves—just a loud squeak, apparently from the servos starting up. We’re left guessing what the cause is—after all, the control surfaces can be moved by hand, can’t they? The cause lies in a mechanical issue: According to the designer’s specifications, the hinge’s pivot point and the servo rod’s attachment point on the control surface are exactly aligned in a single plane. In other words: Imagine a door handle mounted exactly on the pivot axis of the door hinge; such a door
cannot be opened. It can only be opened if the handle is moved toward the outer edge—that is, away from the pivot point. The illustration makes this explanation clear. Consequence: The rudder horns are modified in shape and bore so that the pivot points for the servo rods—that is, where the rods attach—lie outside the hinge axes. Once implemented, the servos and rudder can now be operated without any problems. A dig at the manufacturers and distributors of the model kit—before a product goes on sale, real-world testing cannot be replaced by computer animation.
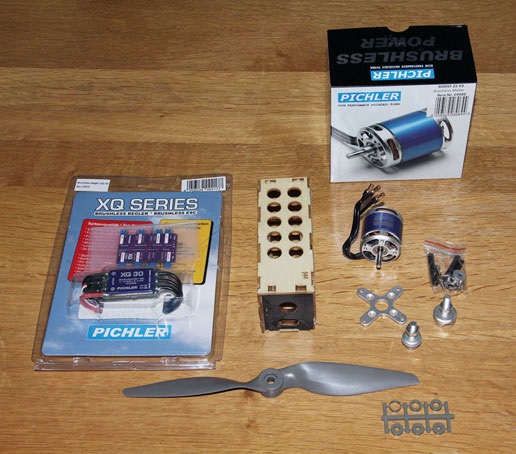
As a final step, the engine cowl is secured with screws at the front; gluing it is not recommended, as different extensions may be required depending on the engine selected. A 35-mm-diameter motor initially supplied by Pichler does not fit under the cowl because, due to scale, the hub opening on the Fieseler Storch is located at the upper edge of the cowl rather than in the center, meaning that a 35 mm outrunner would scrape against the cowling. A 28 mm motor solves the problem. After covering all components with Oratex Antik film, I decide on a Wehrmacht color scheme: camouflage on top, blue on the bottom, with the corresponding insignia. The result is a 1.60-m model that warms every modeler’s heart with its attention to detail.
Preparing for the maiden flight takes time, especially with the adjustment of the six flaps. A word about the Pichler XQ30 controller and the included XQ program card C3057. The latter represents a true innovation: Gone are the days of programming the controller using unidentifiable tone sequences, and no more program card failures because you once again failed to follow the correct sequence step by step—instead, a superb concept: The C3057 is equipped with jumpers for each individual function—e.g., soft or hard start, brake on or off, etc. The jumper set for each function then ensures the specific sequence of operations previously requested by the pilot. You connect the system to the battery, and the programming is complete in a matter of seconds—it doesn’t get any better than that.
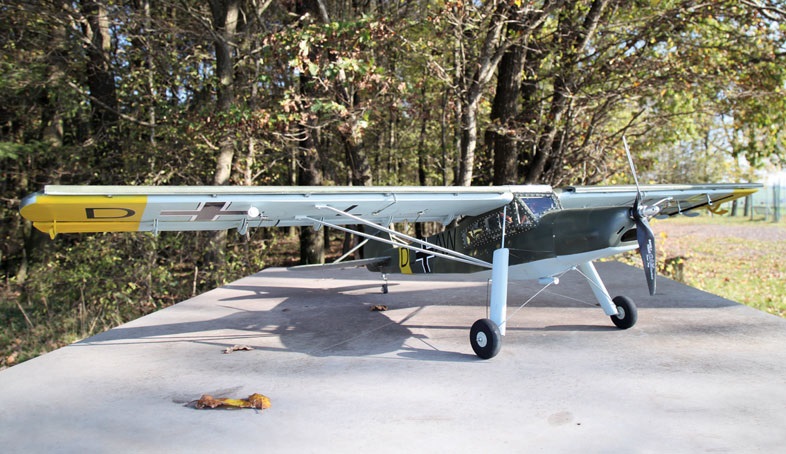
Unfortunately, the first day of flying didn't go as well as hoped.
The 28 Boost 18 outrunner with a 3S battery gets the model rolling, but doesn’t have enough power to lift the little plane off the ground. A motor swap is necessary, and the choice falls on a 28 Proporive V2. With a 4S battery and a 10×6 propeller, it delivers significantly more thrust at 28 amps. Time flies—it’s already fall, and rain and wind dominate the weather. At some point, I’ve had enough—today we’re flying, no matter what. The little stork is placed on the grass, pointed into the wind, and takes off after just a few meters. It flies and seems to defy the winds; no trimming needed—the center of gravity is just right—and our Fieseler boldly circles the sky. The wind and the setting rain won’t allow for more on this day. One thing is certain—the “little stork” flies superbly and lives up to its name.
Conclusion: The 1.60-meter Fieseler Storch is a successful scale model with a high level of detail that even less experienced builders should find easy to assemble. The kit is fully equipped, and the price is reasonable.


News from HEBU

HORIZON HOBBY/LEMACO NEWS: MICRO OV-10 BRONCO 645 MM BY E-FLITE

PRIDE AND GOOD IDEAS
 Markus Nussbaumer

TEAM MANAGER "THIS" BOSSHARD
 Rodito Nussbaumer

YOU KNOW WHAT I MEAN? 125 YEARS OF THE SWISS AERO CLUB
 Emil Giezendanner

F3A EUROPEAN CHAMPIONSHIPS IN ST-MACAIRE, FRANCE
 Matthias Bosshard

ATOM, THE NEW DOUBLE-DECKER FROM CPLR
Matthias Bosshard
SUMMER FUN 2026 AT MG USTER
Martin Wunderli
What's New at Leomotion.com

52. 2026 ALPS CUP
Emil Giezendanner
TWIN TOWN PARTNERSHIP
Wolfgang Voeller
34th HAHNENMOOS ALPINE MODEL AIRPLANE CAMP
Res Dauwalder
CORSAIR F4U – A WARBIRD WITH A MEMORABLE LOOK
Jürgen Rosenberger, Jürgen Prinz
SMALL, MODEL-LIKE SAILBOATS
Res Dauwalder
TRY-OUT DAY AT MFV WETTINGEN
Urs Keller
WELCOME, NEW MEMBER!
Andrea Bolliger
FREE FLIGHT IN THE MIDDLE OF SUMMER
Urs Muntwyler
COUPE DES ALPES – OBSERVE AND LEARN
Rodito Nussbaumer
EURO CONTEST GLIDER ACRO TOUR AUSTRIA 2026

BY YOUTH, FOR YOUTH
Lorena Betschen
INSIGHTS INTO THE HISTORY OF SEAPLANES

THE PC-21 STORY
Emil Giezendanner
NEWS FROM HEBU
 Julia Bucher

FROM 0 TO 100
Markus Nussbaumer
MEMORIES
Wolfgang Völler
NOS REGION – A HUB FOR ELECTRIC AVIATION
Emil Giezendanner
DO YOU KNOW WHAT I MEAN IN THE LAND OF SMILES?
Emil Giezendanner
Have you almost forgotten about aircraft that take off and land vertically?
Emil Giezendanner