
Simple profile sanding from Depron sheets glued together
Of course, you can also use balsa wood!
Anyone who has ever glued Depron pieces together and then sanded a profile knows the problems that glue can cause.
Here’s an easier way: First, I draw a sketch, which I use to cut the Depron sheets to size and then sand the airfoil. The example shows the construction of a horizontal stabilizer with a symmetrical airfoil and a thickness of 12 mm. The direction of flight is from right to left, so the leading edge of the airfoil is on the left.
Good luck: Roland Moser
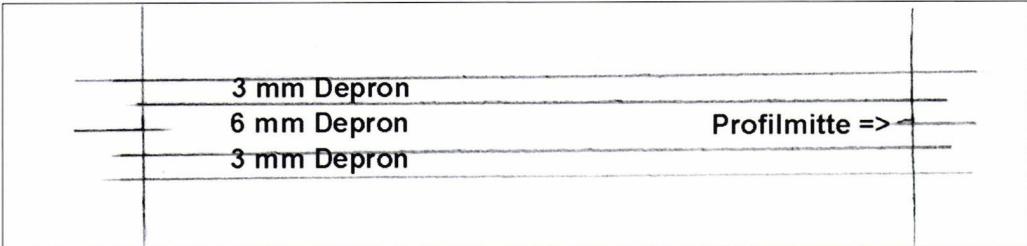
The drawing is made at a 1:1 scale relative to the model. A 6-mm Depron sheet and two 3-mm Depron sheets are marked as if they were to be glued together. This is done across the full depth of the rudder.
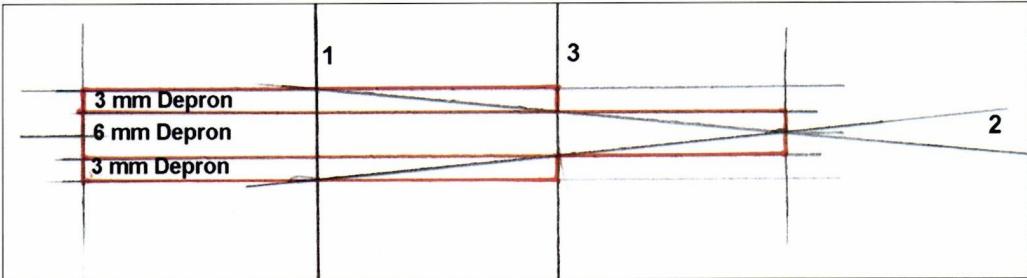
The parts for the horizontal stabilizer of a Me-209. The fold line on the template is not where the stabilizer is cut out. Folding the part over creates the template for the 3-mm Depron parts. If necessary, reinforcements should be glued into the 6-mm Depron. The direction of flight is downward.
First, draw a vertical line (labeled 1 here) where the profile’s sweep is to begin, i.e., at approximately 30 to 35% of the tailplane’s depth. From the two intersection points that result on the upper and lower surfaces, draw two straight lines toward the center of the airfoil at the end of the airfoil (2).
This results in two intersection points on the 6-mm Depron sheet. A vertical line is then drawn through these points (3). This determines the depth of the 3-mm Depron sheets to be glued on. I then traced over the Depron parts with orange paint. I did this solely so that the individual parts would be easier to identify in this article. Since the drawing is on a 1:1 scale, you can now simply measure the depth of the 3-mm Depron and then cut out the three Depron parts using a template.
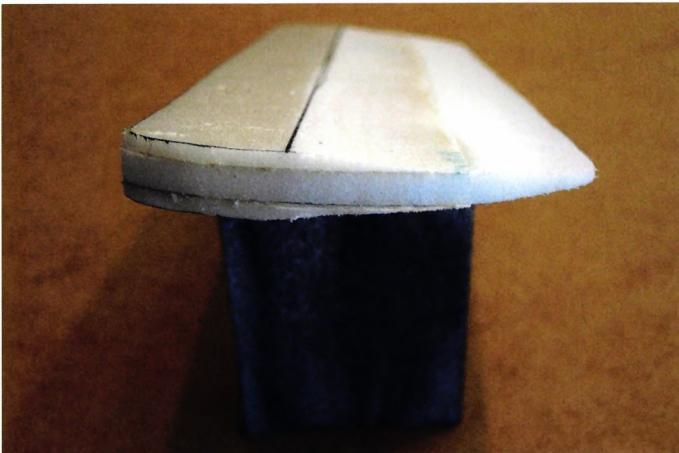
The glued-together horizontal stabilizer. The rear section has already been sanded. The black line on the left marks the spot labeled 1 in Figure 2. A mistake occurred during sanding. In my excitement over the progress, I forgot to leave a 20-mm section unsanded in the center of the tailplane (measured across its width) so that the profile could then be glued into the fuselage structure. I had to build up the missing material with 3 mm of Depron and sand it parallel to the profile axis. The transition from the 6-mm to the 3-mm Depron is also very clearly visible.
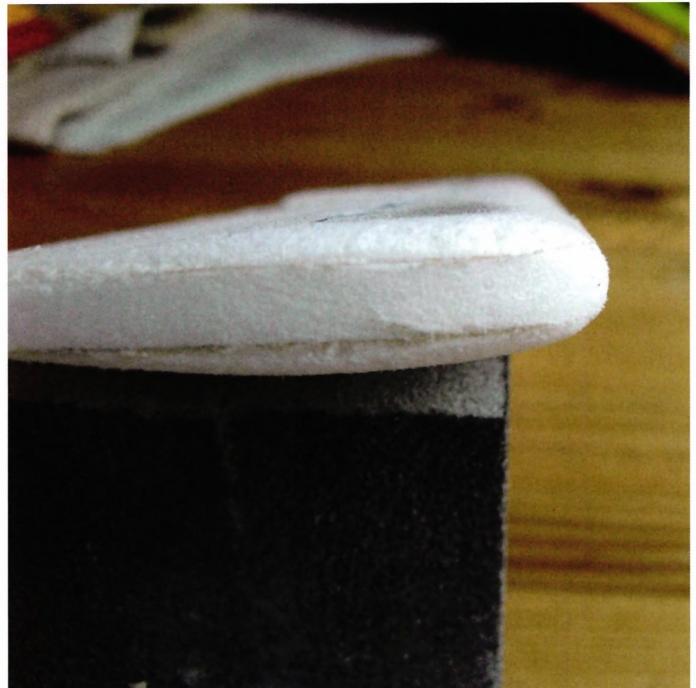
Round off the nose a bit, and you're done. Of course, you could apply the same principle to the nose as well.


TEAM MANAGER "THIS" BOSSHARD
 Rodito Nussbaumer

F3A EUROPEAN CHAMPIONSHIPS IN ST-MACAIRE, FRANCE
 Matthias Bosshard

News from HEBU

YOU KNOW WHAT I MEAN? 125 YEARS OF THE SWISS AERO CLUB
 Emil Giezendanner

SUMMER FUN 2026 AT MG USTER
Martin Wunderli
TRY-OUT DAY AT MFV WETTINGEN
Urs Keller
52. 2026 ALPS CUP
Emil Giezendanner
BY YOUTH, FOR YOUTH
Lorena Betschen
ATOM, THE NEW DOUBLE-DECKER FROM CPLR
Matthias Bosshard
CORSAIR F4U – A WARBIRD WITH A MEMORABLE LOOK
Jürgen Rosenberger, Jürgen Prinz
SMALL, MODEL-LIKE SAILBOATS
Res Dauwalder
What's New at Leomotion.com

TWIN TOWN PARTNERSHIP
Wolfgang Voeller
EURO CONTEST GLIDER ACRO TOUR AUSTRIA 2026

INSIGHTS INTO THE HISTORY OF SEAPLANES

34th HAHNENMOOS ALPINE MODEL AIRPLANE CAMP
Res Dauwalder
HORIZON HOBBY/LEMACO NEWS: MICRO OV-10 BRONCO 645 MM BY E-FLITE

COUPE DES ALPES – OBSERVE AND LEARN
Rodito Nussbaumer
PRIDE AND GOOD IDEAS
 Markus Nussbaumer

FREE FLIGHT IN THE MIDDLE OF SUMMER
Urs Muntwyler
THE PC-21 STORY
Emil Giezendanner
WELCOME, NEW MEMBER!
Andrea Bolliger
NEWS FROM HEBU
 Julia Bucher

FROM 0 TO 100
Markus Nussbaumer
MEMORIES
Wolfgang Völler
NOS REGION – A HUB FOR ELECTRIC AVIATION
Emil Giezendanner
Have you almost forgotten about aircraft that take off and land vertically?
Emil Giezendanner
70 YEARS OF THE NIDWALDEN MODEL AIRPLANE CLUB
Martin Barmettler