
Cessna 185 Sky Wagon by Aeronaut
The Cessna 185, in its original passenger-carrying configuration, is a single-engine, all-metal high-wing aircraft with docile flight characteristics, which ultimately inspired the team at Aeronaut to design a model airplane.
A first glance inside the kit reveals parts packaged by construction stage, all precision-cut with a laser. A closer inspection makes it clear that old-school craftsmanship has been rediscovered here: in addition to a complete assortment of wood, you’ll find screws, rudder linkages, hinges, push rods, etc.—in other words, nothing needs to be purchased separately. The assembly instructions consist of three-color schematic drawings—not photographs—and clearly outline the assembly process in concise terms. A numbered parts list is also included, allowing you to reliably identify the components marked with numbers.
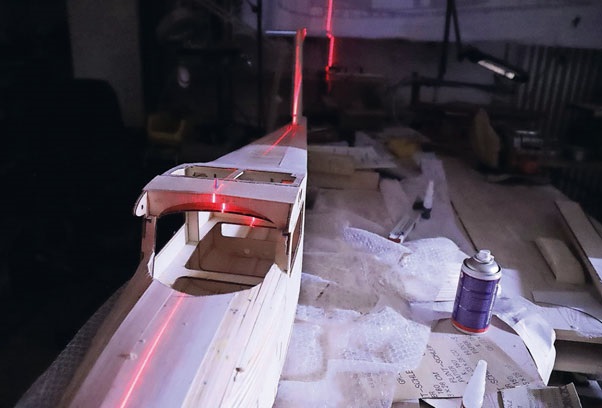
We begin by assembling the fuselage: The side panels are joined using the tongue-and-groove principle. The side panels are doubled up in the engine compartment and cockpit areas; after that, we can insert the first frames into precisely pre-cut grooves without any additional work. One point of criticism—after all, the folks in Reutlingen shouldn’t get too cocky: The laser-cut separation lines could be a bit thicker. The ribs and frames must be cut out of the plywood boards by severing ~1 mm connecting bridges. The work involved is a mix of breaking off the surrounding wood or chiseling with a chisel or utility knife; this usually works, though components are occasionally damaged. The fuselage framework is constructed starting from two horizontal cabin frames by slotting the frames and cross members together using the tongue-and-groove principle. In the next step, we glue pine strips to the top and bottom surfaces, which will serve as a support for the planking to be applied in the following step. While the side walls consist of milled 3-mm poplar plywood, 1.5-mm-thick, precisely cut balsa wood strips are to be inserted on the top and bottom by the manufacturer. Covering the engine compartment with a removable hood that opens downward is somewhat more challenging. Starting at the edges, the surface is planked piece by piece with 5 × 5-mm balsa strips; once dry, they are filled and sanded down to form a spherically rounded front section. We construct the tail section using ten balsa plates that are glued together and then filed into a ducktail shape. As a tip: The author checks the straightness of the fuselage’s longitudinal axis using a laser beam. The test passes without issue, proving that the kit is cut with precision.
When assembling the elevator and rudder, the spar and ribs are inserted with their tabs into the notches of a cardboard form. There is no need for laborious framing because the ribs are inserted into notches in the spar. After removing the control surfaces from the jig, we insert pine roving at the top and bottom. We glue balsa reinforcements to the end strip to serve as counter supports for the control surface hinges. Pre-cut skin panels, joined together with tongue-and-groove joints, are then applied.
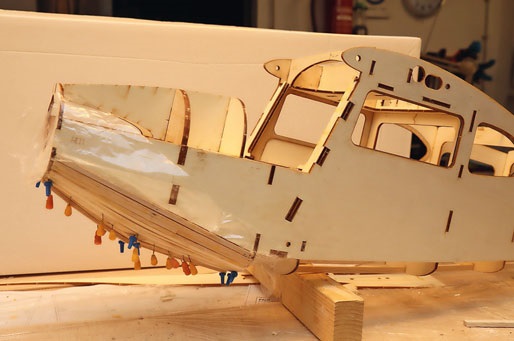
The aileron and elevator control surfaces are constructed in the same way on a cardboard mold. When building the wings, starting at the leading edge, ribs are inserted one by one into the punched holes of the cardboard mold, with pre-cut framing plates placed between them. Servo plates for the ailerons and landing flaps, as well as a brass push-fit tube, are installed. Thanks to the high precision of the fit, the tube can be inserted into the designated holes in the ribs without any further rework. Planking the wings begins by covering the top surface of the rib framework lying in the cardboard formwork. After the glue has dried, remove the frame from the cardboard holder, trim off the rib feet, and plank the underside.
But now to a point of criticism: All of the Cessna’s planking strips consist of 1.5 mm balsa wood, which is by no means hard. No matter how neatly you glue the individual strips, sanding is always necessary! Thin boards are thinned out even further, and clumsy handling during later flight operations leads to dents, as the attached photo shows. The result—I cover all 1.5-mm planking with 49 g glass mat. Filling and painting are the inevitable next steps. A constructive counterproposal: Dear Swabians, use 2.0-mm—or better yet, 2.5-mm—balsa boards; then the problems described above will be eliminated.
Rudder horns, servo installation, wiring—all of this can be assembled quickly thanks to the excellent preparatory work done by the Reutlingen team. The “glass windows” are pre-cut; the milled wooden frames fit in easily, the rudder hinges are inserted through pre-drilled holes, and the main and tail landing gear are secured via corresponding holes.
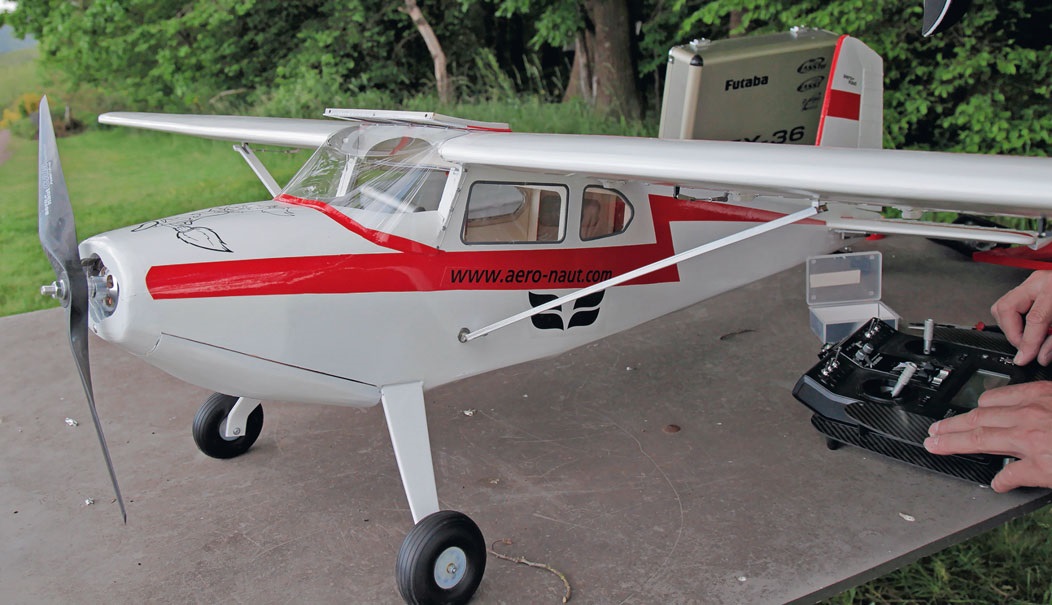
The engine compartment is accessed via the cowling, which can be removed from below. The passenger compartment is accessible only through the roof hatch, a 5 × 10 cm flap. There is a servo for the tailwheel and rudder, which controls two separate Bowden cables. The elevators are equipped with their servo mounts in the corresponding stabilizers. For the powerplant, I’ve opted for an outrunner motor with a 6S LiPo battery. The center of gravity, located 91 mm behind the leading edge, is set after balancing by adding 200 g of lead. The assembly instructions include the necessary trim settings for the elevator, rudder, ailerons, and landing flaps.
One last check at the airfield—a jiggle of the double-sided elevator, and the servo mount comes loose. Lucky break! A quick fix thanks to superglue.
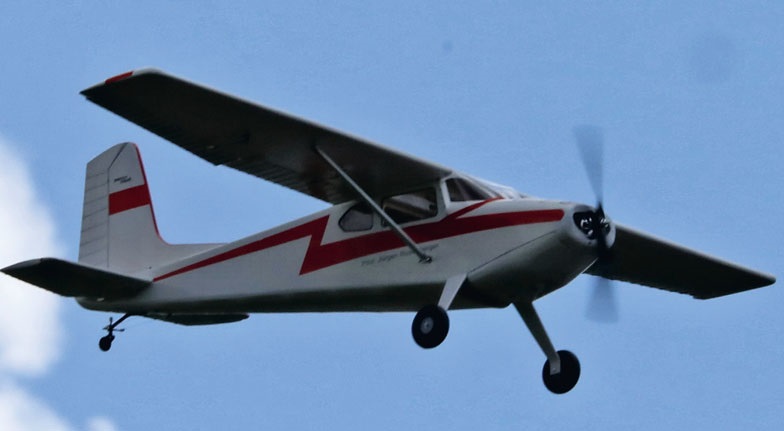
Taxiing without flaps—after 15 to 20 meters, the 6S-powered aircraft takes off. First impression—it’s a bit sluggish in gaining altitude and turning! Otherwise, a flawless straight-line flight with a responsive, well-behaved reaction to all control inputs during takeoff and landing. The sun is setting—no more flights for now. Some time later—the weather is cooperating for once—another attempt. A 100-gram lighter LiPo battery shifts the center of gravity slightly aft. The response to control inputs at the manufacturer’s recommended levels now meets my expectations. You can even put the Wagon into a loop. When the landing flaps are fully extended, the Cessna approaches the ground quite quickly with the addition of 10% elevator input, without becoming too slow or too fast. I subsequently make an adjustment to the landing flaps. Aeronaut specifies short aluminum pins as control horns. The short lever arm results in abrupt control surface movements, which places high demands on the servo’s power output. A longer lever on the control surface remedies this issue. All in all, it’s an extremely robust all-weather aircraft; quickly assembled after work, it offers stress-free recreational flying.
Conclusion: A complete kit with precisely fitting parts and very well-thought-out “3D assembly instructions”—nothing else needs to be purchased. Criticism: The balsa skin material is too thin at 1.5 mm, which prompted the author to apply a fiberglass mat and perform additional follow-up work. In flight, it’s a model suitable for beginners that can also be used as a tow plane for lighter gliders!
Conclusion: A complete kit with parts that fit perfectly and very well-thought-out “3D assembly instructions”; nothing else needs to be purchased. Criticism: At 1.5 mm, the balsa skinning material is too thin, which prompted the author to apply a layer of fiberglass mat and perform additional follow-up work. In flight, this is a model suitable for beginners that can also be used as a tow plane for lighter gliders!
| Wingspan: | 1,990 mm |
| Fuselage length: | 1,420 mm |
| Flight weight: | Manufacturer's specification: 4,900 g; test model including flight battery (806 g): 5,579 g |
| Wing area: | 52.5 dm² |
| Wing loading: | 106.9 g/dm² |
| Servos: | Savöx SH 1250 on all functions |
| Motor: | Turnigy G60 Brushless Outrunner 500 kV |
| Propeller: | Cam Carbon 16 × 8 |
| YGE ESC: | 90 amps |
| Battery: | 6S LiPo 5000 Ah |


News from HEBU

TEAM MANAGER "THIS" BOSSHARD
 Rodito Nussbaumer

SUMMER FUN 2026 AT MG USTER
Martin Wunderli
BY YOUTH, FOR YOUTH
Lorena Betschen
SMALL, MODEL-LIKE SAILBOATS
Res Dauwalder
TRY-OUT DAY AT MFV WETTINGEN
Urs Keller
What's New at Leomotion.com

52. 2026 ALPS CUP
 Emil Giezendanner

ATOM, THE NEW DOUBLE-DECKER FROM CPLR
 Matthias Bosshard

INSIGHTS INTO THE HISTORY OF SEAPLANES

YOU KNOW WHAT I MEAN? 125 YEARS OF THE SWISS AERO CLUB
Emil Giezendanner
34th HAHNENMOOS ALPINE MODEL AIRPLANE CAMP
Res Dauwalder
CORSAIR F4U – A WARBIRD WITH A MEMORABLE LOOK
Jürgen Rosenberger, Jürgen Prinz
F3A EUROPEAN CHAMPIONSHIPS IN ST-MACAIRE, FRANCE
Matthias Bosshard
HORIZON HOBBY/LEMACO NEWS: MICRO OV-10 BRONCO 645 MM BY E-FLITE

PRIDE AND GOOD IDEAS
 Markus Nussbaumer

EURO CONTEST GLIDER ACRO TOUR AUSTRIA 2026

FREE FLIGHT IN THE MIDDLE OF SUMMER
Urs Muntwyler
THE PC-21 STORY
Emil Giezendanner
TWIN TOWN PARTNERSHIP
Wolfgang Voeller
WELCOME, NEW MEMBER!
Andrea Bolliger
COUPE DES ALPES – OBSERVE AND LEARN
Rodito Nussbaumer
NEWS FROM HEBU
 Julia Bucher

FROM 0 TO 100
Markus Nussbaumer
MEMORIES
Wolfgang Völler
NOS REGION – A HUB FOR ELECTRIC AVIATION
Emil Giezendanner
Have you almost forgotten about aircraft that take off and land vertically?
Emil Giezendanner
70 YEARS OF THE NIDWALDEN MODEL AIRPLANE CLUB
Martin Barmettler