
The desire for a semiscale helicopter
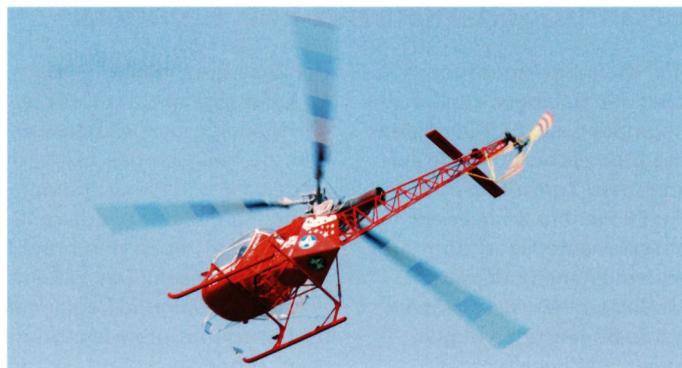
Many model helicopter pilots dream of building and flying a semi-scale or scale model helicopter someday. But even the thought of all the work involved—choosing the model, deciding on the color scheme, or working out the details—often causes these projects to fizzle out. A.L.K., together with HeliClassics and S-S-M Technik, has been thinking about how to make it easier for pilots to get started.
I read this announcement in a magazine. I called A.L.K. right away. But I was told that both workshops—each with 10 participants—were already fully booked for both days. However, since demand was so high, they were considering offering another workshop on a different date. A few days later, Anton Laube from A.L.K. called me again and told me that a third workshop would be held on Saturday evening at 8 p.m. during that weekend. Once again, Anton demonstrated that he truly lives by the motto “Nothing is impossible.”
With very high expectations, I set off on the long-awaited day for A.L.K. Modellbau & Technik GmbH in Würenlingen. With 11 participants, the workshop was able to start right on time at 8 p.m. We were greeted by the head of A.L.K., Anton Laube. He informed us that Sascha Schröppel from S-S-M Technik was unfortunately unable to attend due to the flu. Matthias Strupf from HeliClassics, however, was present and in good health.
Since the course took place at A.L.K.’s business premises, I was surprised by the extensive selection of helicopter products carried by the company. Well over 10,000 items from all major manufacturers and suppliers are displayed across approximately 200 m².
In the first part of the workshop, Anton Laube covered topics such as “What is scale, what is semi-scale, getting started with scale flying, powerplants, the real-world model, choosing a model, selecting a powerplant,” and much more. He also addressed topics related to how I plan to use the model: competitions, flight days, or just for my own enjoyment. And, as always, what about my budget? Anton placed great emphasis on the topic of “which real-world model to base it on.” To be able to take as many pictures as possible of your favorite helicopter, it shouldn’t be 1,000 kilometers away. But when taking photos, you should also pay attention to the angle relative to the helicopter as well as the lighting. A photo taken at the wrong angle to the helicopter can distort the image. I never would have dreamed that I’d have to pay attention to so many details when selecting the real-life model and the scale model, but as Anton so beautifully put it: “No one is born a master, and the right start makes the model builder happy.”
After a coffee break, Matthias took the lead. First, he showed us a fiberglass hull. The question was what to make of it. After examining it at length, we agreed that there was nothing unusual about this hull. Matthias explained to us that this hull was actually a reject
because it was 400 grams too heavy and the fabric layers inside weren’t properly laid in. He had tried once again to outsource the manufacture of the fuselages, but once again, fuselages were delivered that were unusable. So he had no choice but to continue laminating them himself. For the first time, it dawned on me that you can’t judge this by appearances—no, the secrets lie within. Another topic Matthias discussed was fitting and laminating the frames: the frame doesn’t have to fit snugly into the fuselage, but should have a little space so it doesn’t leave an imprint. Before laminating, the inside of the fuselage must be sanded and degreased.
He also showed us what to look out for when installing mechanical components, working on the tail drive, and dealing with the tail rotor, as well as how to adjust a multi-blade rotor head. Our two instructors were a little disappointed that, with today’s modern control systems, less emphasis is placed on precise mechanical adjustments. Using an example, Anton showed us how, two years ago, he received a customer’s helicopter for adjustment where the push-pull linkages were misaligned by 6 mm relative to one another. There was no need to elaborate on the fact that this can be fatal for a helicopter, especially here in the scale model sector.
Next, we moved on to hands-on work. Matthias gave us a fiberglass part that we could use to practice sanding. With the right materials, it’s almost child’s play. After sanding and degreasing, we were allowed to paint our part outdoors using a spray can. While we waited for the paint to dry so we could continue working on our test pieces, Anton took over the section on S-S-M Technik. I hadn’t realized before that this company offers a range of accessories, from dummy radios to LCD screens. The finished cockpits with lighting are practically a must-have for a scale cockpit. We were then introduced to the models from S-S-M: from the Bell 47 to the Lama with a rotor diameter of 1.8 or 2 meters.
In the meantime, our paint had dried, and Matthias showed us how easily certain weathering effects can be applied to the model using carbon powder. An experienced scale model builder and pilot remarked that he’d even learned something new himself. That certainly speaks to the quality of the seminar. Using pictures, we were shown the difference between a normally painted helicopter and an “aged” one. By the way, at A.L.K., you can commission individual intermediate construction stages or scale paint jobs.
My expectations were exceeded. Anton and Matthias, thank you very much.


News from HEBU

TEAM MANAGER "THIS" BOSSHARD
 Rodito Nussbaumer

SUMMER FUN 2026 AT MG USTER
Martin Wunderli
SMALL, MODEL-LIKE SAILBOATS
Res Dauwalder
TRY-OUT DAY AT MFV WETTINGEN
Urs Keller
What's New at Leomotion.com

52. 2026 ALPS CUP
 Emil Giezendanner

ATOM, THE NEW DOUBLE-DECKER FROM CPLR
 Matthias Bosshard

INSIGHTS INTO THE HISTORY OF SEAPLANES

YOU KNOW WHAT I MEAN? 125 YEARS OF THE SWISS AERO CLUB
Emil Giezendanner
34th HAHNENMOOS ALPINE MODEL AIRPLANE CAMP
Res Dauwalder
CORSAIR F4U – A WARBIRD WITH A MEMORABLE LOOK
Jürgen Rosenberger, Jürgen Prinz
F3A EUROPEAN CHAMPIONSHIPS IN ST-MACAIRE, FRANCE
Matthias Bosshard
HORIZON HOBBY/LEMACO NEWS: MICRO OV-10 BRONCO 645 MM BY E-FLITE

PRIDE AND GOOD IDEAS
 Markus Nussbaumer

EURO CONTEST GLIDER ACRO TOUR AUSTRIA 2026

BY YOUTH, FOR YOUTH
Lorena Betschen
FREE FLIGHT IN THE MIDDLE OF SUMMER
Urs Muntwyler
THE PC-21 STORY
Emil Giezendanner
TWIN TOWN PARTNERSHIP
Wolfgang Voeller
WELCOME, NEW MEMBER!
Andrea Bolliger
COUPE DES ALPES – OBSERVE AND LEARN
Rodito Nussbaumer
NEWS FROM HEBU
 Julia Bucher

FROM 0 TO 100
Markus Nussbaumer
MEMORIES
Wolfgang Völler
NOS REGION – A HUB FOR ELECTRIC AVIATION
Emil Giezendanner
Have you almost forgotten about aircraft that take off and land vertically?
Emil Giezendanner
70 YEARS OF THE NIDWALDEN MODEL AIRPLANE CLUB
Martin Barmettler