
Integrating Digital Printing into Traditional Construction
In recent years, we’ve seen a growing number of individual projects popping up here and there involving the 3D printing of parts for our hobbies. Indeed, the very idea of making small accessories or details specific to an RC model, for example, is appealing, especially since print files are becoming increasingly accessible online (thanks, Marc...).
As a complete novice in this field—though I have long been experienced in building models out of composites and wood—I came up with the idea, as part of a traditional build I was working on, to “graft,” so to speak, 3D-printed parts that were larger than anything I’d seen before
in this regard, without any structural impact on the model. The advantages here are that the parts are more resistant to potential mishandling (some are more vulnerable than others...) and also printed in negative so they fit directly into the aircraft’s structure without any adjustments, which is very practical.
While it goes without saying that one must have a printer and proven skills in using design software—such as the basics of the field—there is still some gap between theory and practice, which manifests itself in the following questions:
– With so many types of filaments available on the market, how can you be sure
Do their properties meet our needs? How can we effectively narrow down the vast array of products available?
- How can we gain at least a basic understanding of their mechanical properties based on a technical data sheet?
- How can we ensure, depending on the material chosen, that the final weight of the printed parts remains within acceptable “model-making” limits?
- Is internal ribbing required?
- Is it reliable, does it melt in the sun, etc.?
While there are many FabLabs and self-service centers (horrible Anglicisms...) in our region, as well as well-equipped and willing friends capable of scanning and printing, very few seem to date to meet the specific needs of modelers. I would add—and I hope I’m wrong—that there is still very little practical feedback available to non-specialists on this subject, which is precisely what I am
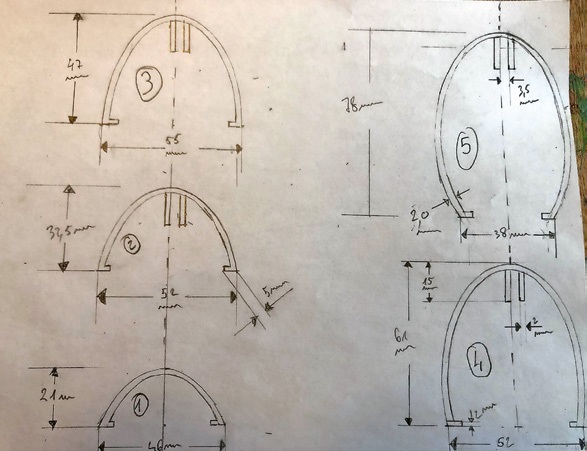
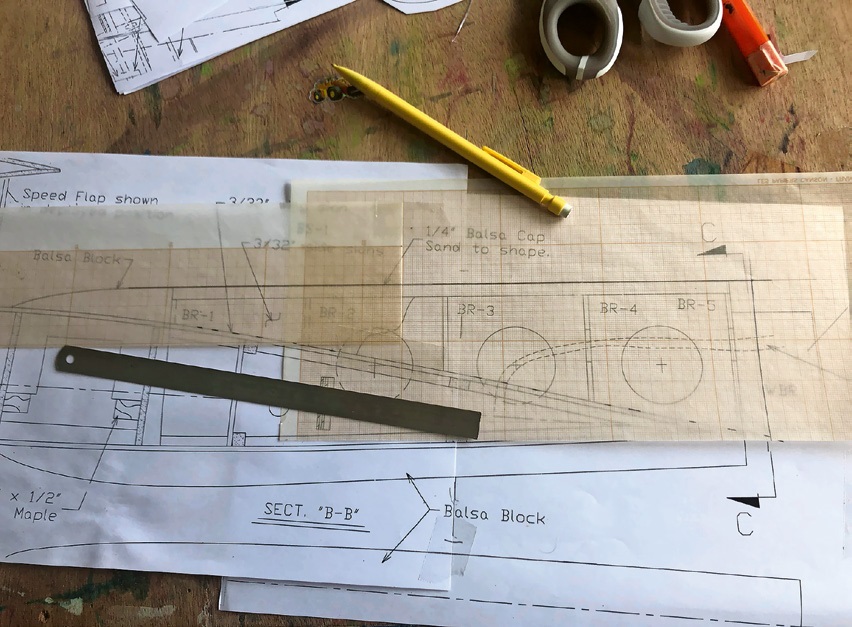
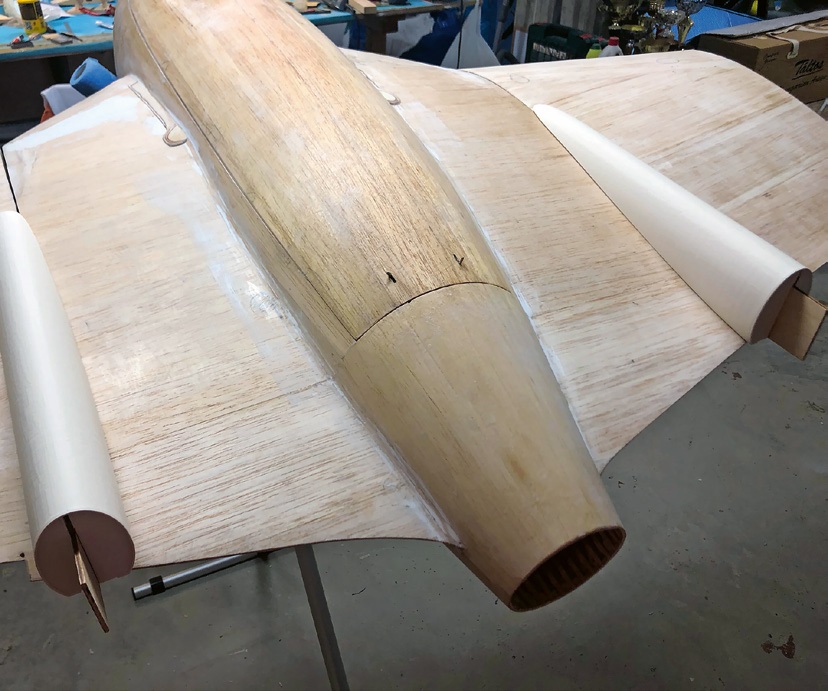
So I started with the following practical case: printing the upper and lower fairings for the fuselage beams of a 1:5 scale De Havilland Vampire. These fairings are approximately 40 cm long

Product name: 3DJAKE niceBIO
Version: 1.1
Date: 18.02.2022
Dimensions
| Size | Ø tolerance | Roundness |
|---|---|---|
| 1,75 mm | ± 0,05 mm | ≥ 95% |
| 2,85 mm | ± 0,10 mm | ≥ 95% |
Physical properties
| Description | Typical value | Test method |
|---|---|---|
| Specific gravity | 1,33 g/cc | ISO 1183 |
| MFR 210 °C/2,16kg | 7 g/10 min | ISO 1133 |
| Tensile strength | 55 MPa | ISO 527 |
| Breaking stress | 2% | ISO 527 |
| Flexural modulus | 5100 MPa | ISO 527 |
| Impact strength | 43 kJ/ m2 | ISO 179-1/1eA |
| Shrinking | 0,4 % | ISO 294-4 |
Thermal properties
| Description | Typical value | Test method |
|---|---|---|
| Printing temperature | 200 – 230 °C | - |
| Melting temperature | 190 °C ± 10 °C | ISO 3146-C |
| VICAT A | 146 °C | ISO 306 |
| HDT / B | 54 °C | ISO 75 |
Packaging:
All spools are sealed and packed with silica gel to avoid humidity.
Additional info:
Due to its low tendency to warp 3DJAKE niceBIO can also be printed without a heated bed.
If you have a heated bed the recommended temperature is ± 0-60°C.
niceBIO can be used on all common desktop FDM or FFF technology 3D printers.
Storage: Cool and dry (15-25°C) and away from UV light. This enhances the shelf life significantly.
Web: www.3djake.com
Mail: office@3djake.com
Tel: +43 800 100 350 15
Niceshops GmbH
Saaz 99, Paldau
Austria
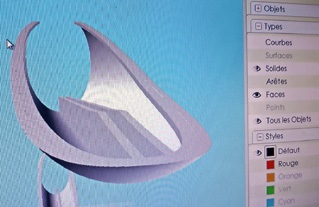
Digitization that gives you a preview of the resulting features.
10 cm high. The goal here is to replace the models shown in the plans—made of 20 mm balsa wood mounted on stringers and topped with 10 mm balsa wood, properly shaped with a sanding block—all reinforced with 49 g/m² fiberglass cloth and epoxy resin. What would the result be?
The next step after the design was to select the material. So I turned to the FabLab materialize.ch (which defines itself more as a service provider…), whose distinctive feature is that it is run by a model maker who still builds almost all of his own models (which is becoming rare…), making him perfectly capable of assessing the requirements accurately and promptly. Thanks to his practical experience and numerous discussions, we were able to determine the material for the print—
The selected product sheet.
Here are the specifications for this model. As you will surely notice, without a specialist capable of deciphering your needs, this technical data sheet is—to say the least—not very easy to interpret for the ultimate purpose of building a full-scale RC model.
After providing the corresponding drawing, the first digitized schematics appeared. These showed that, with the same thickness as the balsa/fiber sandwich originally planned, the calculated mass was more than 40% higher than the initial estimate. The thickness was therefore reduced from 20 to 15/10th to achieve a weight reduction of about 25%, which seems acceptable to me given the expected benefits. Four upper and lower fairings were thus integrated into this model with the utmost precision, which is truly satisfying.
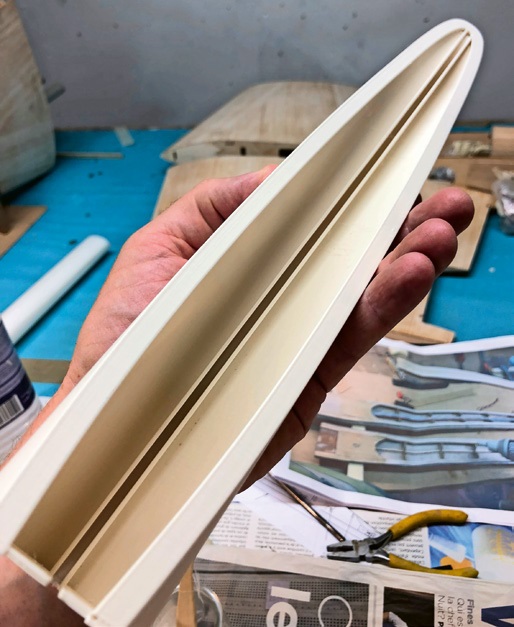
The resolution achieved was 0.1 mm. Keep in mind, however, that thorough sanding is required—first with 120- and 180-grit sandpaper using a dry method to remove the print lines, then with 240- and 320-grit sandpaper using a wet method for the final finish. Cutting with a fine Dremel blade also requires some precautions to ensure that, unlike a slab of fresh butter or the ABS plastic of our youth, the material is cut rather than melted during the process.
In conclusion: while this brief practical report is intended for modelers who are curious and eager to improve their models by incorporating the latest techniques, I also realize the immense ground that remains to be covered—not only to print parts that are increasingly viable for specific needs, but also to streamline all the many choices available to us in the future. As was the case with the first all-composite constructions some forty years ago, I therefore encourage modelers interested in this field to share their experiences for the benefit of our close-knit community, which has everything to gain from it...
I’d like to thank Anthony H. for his expertise and sound advice: materialize.ch


What's New at Leomotion.com

PRIDE AND GOOD IDEAS
 Markus Nussbaumer

News from HEBU

TEAM MANAGER "THIS" BOSSHARD
 Rodito Nussbaumer

ATOM, THE NEW DOUBLE-DECKER FROM CPLR
 Matthias Bosshard

INSIGHTS INTO THE HISTORY OF SEAPLANES

34th HAHNENMOOS ALPINE MODEL AIRPLANE CAMP
Res Dauwalder
CORSAIR F4U – A WARBIRD WITH A MEMORABLE LOOK
Jürgen Rosenberger, Jürgen Prinz
SUMMER FUN 2026 AT MG USTER
Martin Wunderli
F3A EUROPEAN CHAMPIONSHIPS IN ST-MACAIRE, FRANCE
Matthias Bosshard
52. 2026 ALPS CUP
 Emil Giezendanner

HORIZON HOBBY/LEMACO NEWS: MICRO OV-10 BRONCO 645 MM BY E-FLITE

TWIN TOWN PARTNERSHIP
Wolfgang Voeller
EURO CONTEST GLIDER ACRO TOUR AUSTRIA 2026

BY YOUTH, FOR YOUTH
Lorena Betschen
YOU KNOW WHAT I MEAN? 125 YEARS OF THE SWISS AERO CLUB
Emil Giezendanner
SMALL, MODEL-LIKE SAILBOATS
Res Dauwalder
TRY-OUT DAY AT MFV WETTINGEN
Urs Keller
WELCOME, NEW MEMBER!
Andrea Bolliger
FREE FLIGHT IN THE MIDDLE OF SUMMER
Urs Muntwyler
THE PC-21 STORY
Emil Giezendanner
COUPE DES ALPES – OBSERVE AND LEARN
Rodito Nussbaumer
NEWS FROM HEBU
 Julia Bucher

FROM 0 TO 100
Markus Nussbaumer
NOS REGION – A HUB FOR ELECTRIC AVIATION
Emil Giezendanner
MEMORIES
Wolfgang Völler
Have you almost forgotten about aircraft that take off and land vertically?
Emil Giezendanner
70 YEARS OF THE NIDWALDEN MODEL AIRPLANE CLUB
Martin Barmettler