
My First Scale Model
Inspired by a series of articles by engineer Dieter Schlüter from the early days of model helicopter flying, I decided to build a model airplane. However, it would have been presumptuous to consider building a helicopter, because back then even the aforementioned helicopter pioneer hadn’t yet reached the point where he had his design completely under control.
Besides, I have practically no experience with model-building techniques, having built only two small hand-launched gliders, the “Hobby” and the “Jolly,” as well as a model ship, the “Agilis.” The new model should look appealing and be built on a relatively large scale so that details are clearly visible. That really left only a scale model as an option. So I started looking into that. I didn’t want a kit model, so I wouldn’t end up with the same type everywhere. I’ve always been fascinated by vintage aircraft, especially biplanes, so from there it wasn’t a big leap to the “Sopwith Camel,” based on plans adapted by Franz Meier of Rüti.
Admittedly, my path from two small hand-launched gliders to a “scale model” isn’t the usual one. A scale model requires many hours of work, and my lack of experience certainly doesn’t help speed up the process. A novice really needs to think such a decision through carefully, and there are three points to keep in mind. First, you should strictly follow the assembly instructions; that way, you won’t suddenly find yourself unable to install a part.
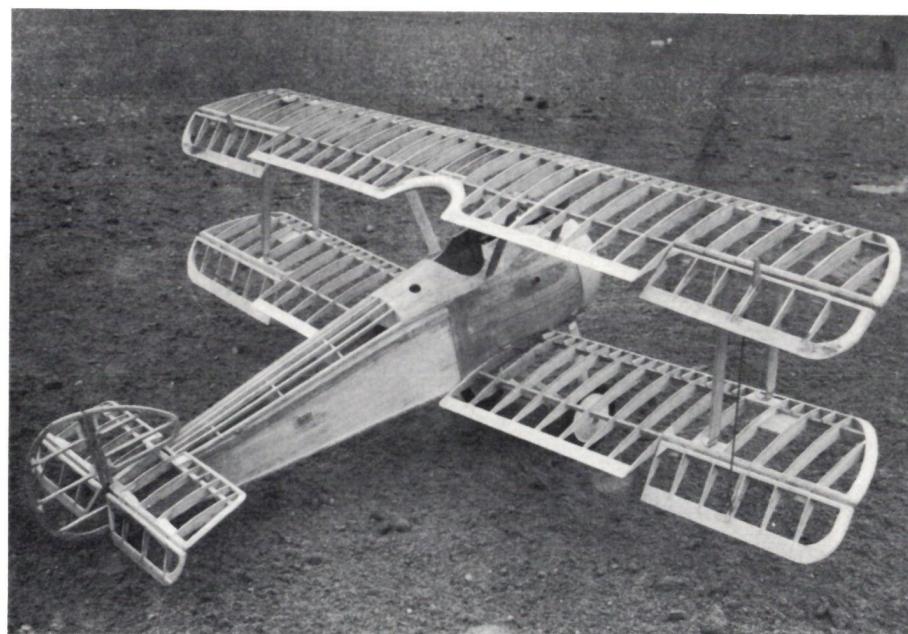
On the one hand, you can do this, and on the other hand, you have to make sure that the individual assemblies are built neatly and are self-contained.
Third, you should wait to buy the expensive parts—like the motor and remote control—until the model is practically finished. That way, you can keep the joy of building alive. So, using this approach, it’s possible to build something attractive without being an absolute pro.
Of course, I also ran into difficulties—quite early on, in fact. With the filler pieces above the lower wing, I wasn’t entirely sure of the exact shape at first. For the skinning of the front section, I first made a template out of 1-mm balsa wood and
only transferred the shape to 3-mm balsa after carefully adjusting it. The balsa block at the top front, with its final spherical shape for the two machine guns, also took time because its exact shape isn’t entirely clear from the plan. That’s really the only thing to criticize about this excellent construction plan. It would be helpful to have a “top view” available as well. However, I was able to figure this out by looking at the original model. The same goes for the mounting of the machine guns.
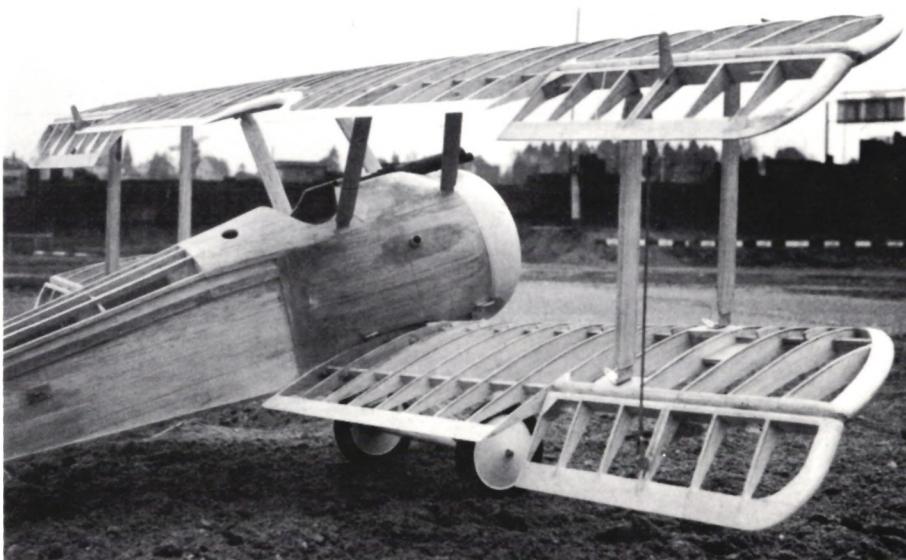
According to the assembly instructions, the aluminum struts connecting the lower and upper wings as well as the landing gear are to be covered with balsa wood. For any future Camel builders, however, I recommend using abachi wood, as on the original, which is simply varnished later and thus looks more authentic than balsa wood treated with pore filler and spray-painted. Something amusing happened to me with these aluminum parts. As a mechanical engineer—since we always specify dimensions in “mm”—I drew up sketches for Spengler, marked all dimensions with the millimeter symbol, and, just to be absolutely sure, specified in the order text: “All dimensions in millimeters.” But when I went to pick up the parts, everything was still ten times too big. I stood there in amazement in front of the chassis panels, which, at 2 x 2 meters, were quite massive. A day later, the order was finally correct. Of course, I didn’t ask any further questions about what the sheet metal worker planned to do with the 90% waste.
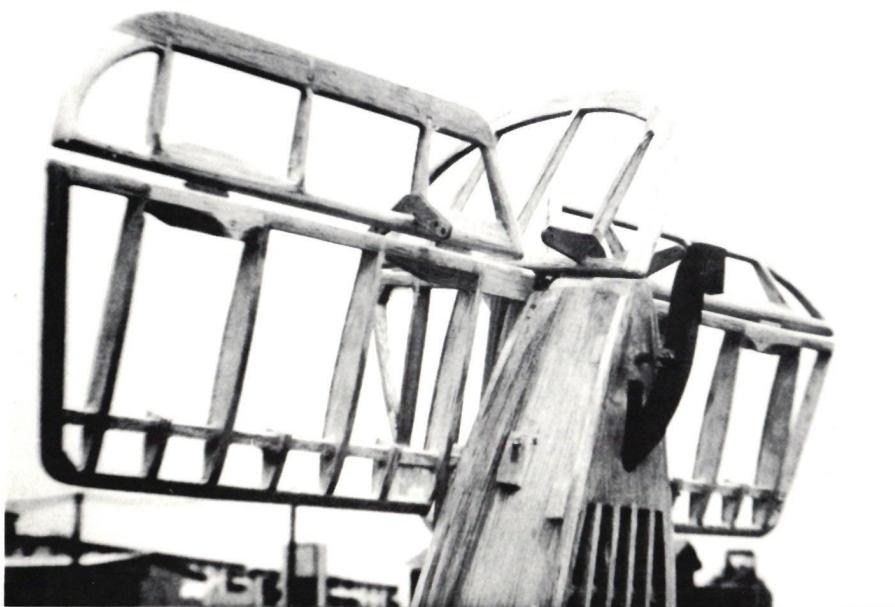
You should screw the chassis panels together before cutting them out to ensure they’re exactly the same shape. A good saw is worth its weight in gold here. I actually drilled everything out. In total, that would have amounted to a 50-centimeter-long hole—and all by hand! After—
Once the airframe was finally complete, I asked Franz Meier to take a critical look at the model. Here, too, I received valuable tips. Although the surfaces for the covering were completely smooth, the edges at the tail and nose weren’t rounded. The
Otherwise, Mr. Meier was always happy to answer my questions over the phone; you just should try to group your questions together a bit. If you’re still not satisfied after completion, you can tackle the cockpit. You can find the necessary reference material—in the form of photos—in model magazines such as “Profil No. 31” and the April, May, and June 1970 issues of “Scale Modells.”
In the end, you’ll be the proud owner of a truly magnificent model that will bring you great joy. At the same time, you’ll have succeeded in forging genuine interpersonal relationships—and when you really think about it, that seems to me to be the most important thing of all. W. Wirth
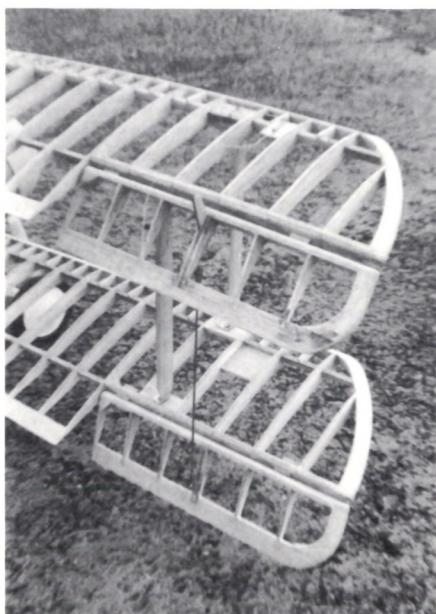
would inevitably have caused the fabric to be pulled inward. These are all basic concepts for experts—but extremely valuable tips for laypeople. I’ve now corrected this, and the elevator, ailerons, and rudder are now perfectly covered. In doing so, I followed the instructions provided by K. H. Denzin as described in his book *Bauen und Fliegen* (Building and Flying).


TEAM MANAGER "THIS" BOSSHARD
 Rodito Nussbaumer

F3A EUROPEAN CHAMPIONSHIPS IN ST-MACAIRE, FRANCE
 Matthias Bosshard

News from HEBU

YOU KNOW WHAT I MEAN? 125 YEARS OF THE SWISS AERO CLUB
 Emil Giezendanner

SUMMER FUN 2026 AT MG USTER
Martin Wunderli
TRY-OUT DAY AT MFV WETTINGEN
Urs Keller
52. 2026 ALPS CUP
Emil Giezendanner
BY YOUTH, FOR YOUTH
Lorena Betschen
ATOM, THE NEW DOUBLE-DECKER FROM CPLR
Matthias Bosshard
CORSAIR F4U – A WARBIRD WITH A MEMORABLE LOOK
Jürgen Rosenberger, Jürgen Prinz
SMALL, MODEL-LIKE SAILBOATS
Res Dauwalder
What's New at Leomotion.com

TWIN TOWN PARTNERSHIP
Wolfgang Voeller
EURO CONTEST GLIDER ACRO TOUR AUSTRIA 2026

INSIGHTS INTO THE HISTORY OF SEAPLANES

34th HAHNENMOOS ALPINE MODEL AIRPLANE CAMP
Res Dauwalder
HORIZON HOBBY/LEMACO NEWS: MICRO OV-10 BRONCO 645 MM BY E-FLITE

COUPE DES ALPES – OBSERVE AND LEARN
Rodito Nussbaumer
PRIDE AND GOOD IDEAS
 Markus Nussbaumer

FREE FLIGHT IN THE MIDDLE OF SUMMER
Urs Muntwyler
THE PC-21 STORY
Emil Giezendanner
WELCOME, NEW MEMBER!
Andrea Bolliger
NEWS FROM HEBU
 Julia Bucher

FROM 0 TO 100
Markus Nussbaumer
MEMORIES
Wolfgang Völler
NOS REGION – A HUB FOR ELECTRIC AVIATION
Emil Giezendanner
Have you almost forgotten about aircraft that take off and land vertically?
Emil Giezendanner
70 YEARS OF THE NIDWALDEN MODEL AIRPLANE CLUB
Martin Barmettler