
Sud Aviation SE 210 Caravelle
Even at a young age, I realized I wouldn’t be able to build a “real” scale model. Back then, I had great admiration for our great scale model pioneer, Franz Meier. On top of that, my involvement with F3A completely filled up my free time.
Tackling
Larger Projects Having more time gave me the opportunity to plan somewhat more elaborate builds. It began with the four-engine Boeing 314 Clipper (1938), a flying boat. Together with friends, I built two of them entirely out of wood. They’re still a rare sight at seaplane gatherings. My appetite grew as I went along. Another model was the Candair CL-215 (1967)—an amphibious aircraft primarily used for firefighting. We built two of these as well. We were assisted in this by an amateur CAD designer. What still fascinates me about this aircraft is the design of the retractable landing gear. This was meticulously replicated by a mechanic in our club.
I’ve always considered building scale models of commercial airliners a special challenge—their bulky fuselages and narrower, highly swept wings.
There are already model kits on the market. I was able to admire the Caravelle in flight for the first time at the opening of Kloten Airport (1948)—the communications with the control tower were broadcast over the loudspeakers and were in French. The Sud Aviation SE 210 Caravelle (maiden flight in 1955) introduced a completely new engine layout and generated 147 orders, making it the largest production run in Europe at the time; the De Havilland D.H. 106 Comet (first flight in 1949) came a little earlier, with only 16 units produced. A number of tragic crashes prevented further development. For me, the Caravelle remained a fond memory. In 1967, my brother and I flew a Caravelle from Nice to Ajaccio, Corsica, to compete in the F3A World Championships. It was a magnificent experience. The runway ended at the sea—as we were getting out, I saw that the pilots had deployed the brake parachute. Probably just a routine precaution—or perhaps there were some non-swimmers among them... For me, the Caravelle is one of aviation’s iconic aircraft. Because of its slender fuselage and large wing area, pilots are said to have affectionately nicknamed it the “glider” back in the day. Flights with my models confirm this good-natured characteristic. A nice side effect: The Caravelle is currently hardly ever seen at model airfields.
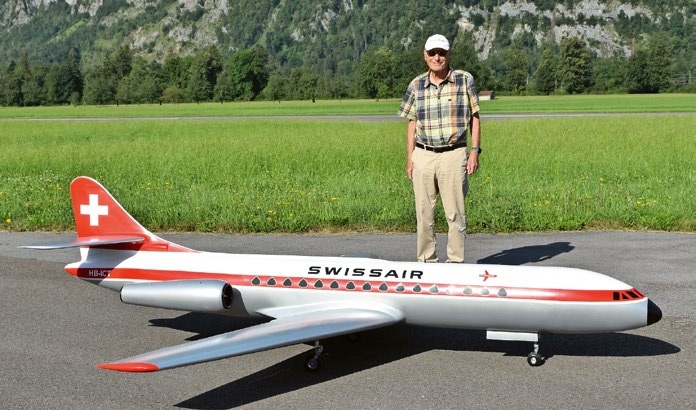
When I follow the development of larger and more complex models, I see the classic “lone wolf,” but also, time and again, teamwork. Keeping a team together is an achievement in itself—especially when things aren’t going well. Based on my positive experiences, I’ve stuck to purchasing specific services. It’s not cheap, but it’s been successful. For the Caravelle, I outsourced the Styrofoam milling and hot-wire cutting work:
1. CAD design: fuselage, tail section, wings
2. CNC milling of the tail and nose
sections 3. CNC hot-wire cutting of the fuselage tube, wings, and tail section
I then covered the center section of the fuselage—which was now ready for fabrication—as well as the wings and tail with 1.5 mm balsa and covered it with fiberglass cloth. I made rudimentary preparations for mold-making on the tail and nose sections. Since I hadn’t built any molds or laminated any fuselages since my last F3A models, I was able to outsource this work to a colleague who specializes in plastics. We had structured the contract in stages, including payment. →
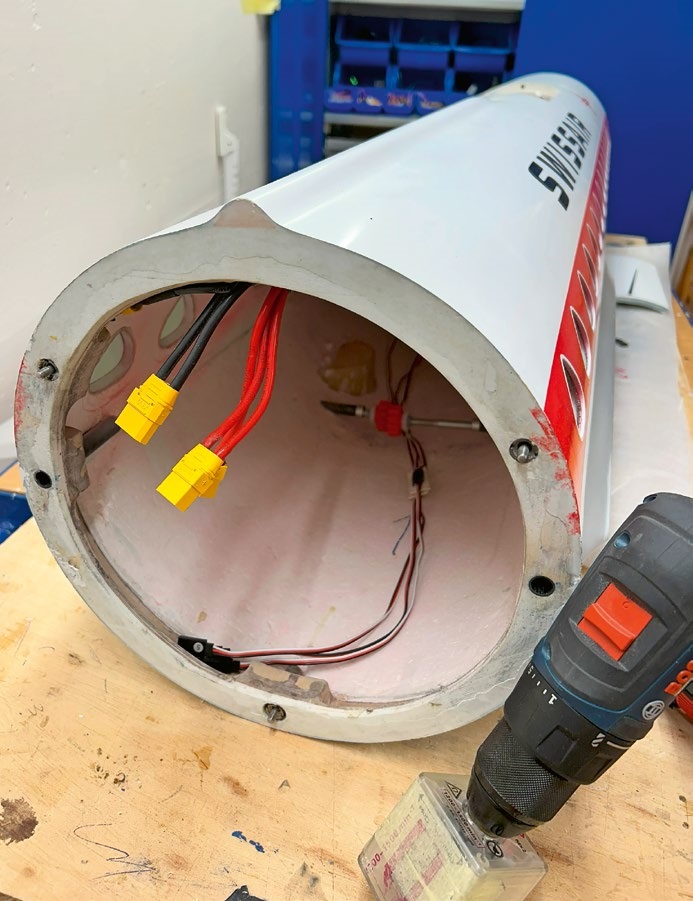
1. Making the molds: tail section, engine nacelles, and nose from the Styrofoam parts
I supplied 2. Laminating the four parts
3. Assembly and finishing work
Assembling the three fuselage sections into a secure connection using the “invisible” magnetic screw system was a tricky and highly precise task. I was able to confidently leave this to my plastics specialist, as well as the 3D printing of the windows. A finish without a spray booth would no longer be acceptable today. That, too, was part of the job. Ultimately, I was left with installing the landing gear, the RC control system, and mounting the engines and their power supply.
The wing skinning itself is simple. However, it’s important to note that the areas around the landing gear need to be reinforced. I used carbon fiber fabric for this. The pre-drilled holes for the wing joints were lined with lightweight 25-mm carbon tubes. For the landing gear assembly, I always used 4- to 5-mm-thick birch plywood. I chose a panel large enough to distribute the forces across the Styrofoam. The 6-mm Styrofoam wall of the fuselage center section was also cut very precisely with a hot wire. Here, too, scraps of carbon fiber fabric were used for reinforcement around the tail, nose landing gear, and fuselage joints. The access panel for the RC system had to be well planned. This helps avoid poor accessibility and sealing issues. The wing mounting screws should also be considered early on. They must be accessible by hand—because the fuselage is long.
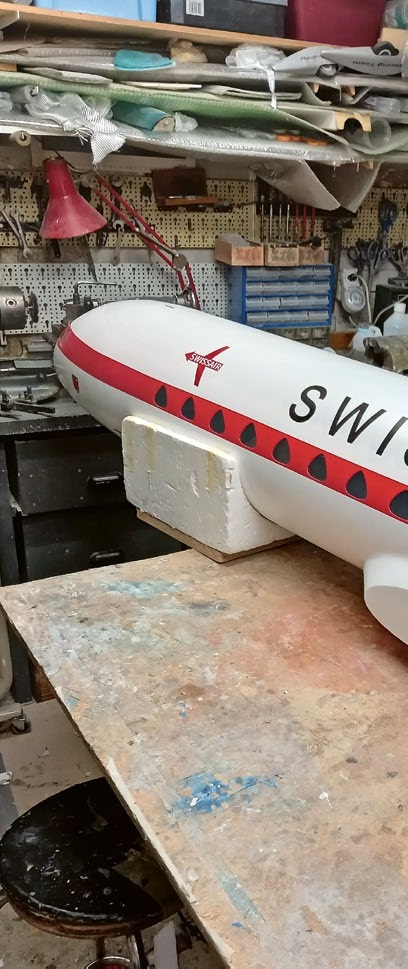
The Caravelle is easy to build; with modern tools, it can be done without too much effort. Today, I’d probably use 3D printing for the molds instead of Styrofoam.
Now I can finally reveal it: I’ve built two Caravelles. Experience has taught me that I learned from my mistakes on the second attempt. I wanted to avoid repeating those mistakes—if possible—but made up for them with others...
The remaining tasks are: installing the boundary layer fences and retrofitting the landing gear with brakes. For now, I’m putting the whole project on hold.
According to test pilot Matthias, the flight characteristics are problem-free. The center of gravity position and settings have proven satisfactory. A lot of hard work has thus culminated in a wonderful achievement. I thank everyone for their support.
Photos and video:
M. and R. Nussbaumer
| Scale: | 1:10 |
| Wingspan: | 3.4 m |
| Fuselage length: | 3.6 m |
| Aircraft weight: | 20,200 kg |
| Propulsion: | 2x Schubeler DS-51-DIA HST® (93 mm) |
| Battery: | 2x 10,000 mAh, 6S |
| Speed controller: | 2x Jeti |
CAD design, Styrofoam work:
Melchior GmbH, 8620 Wetzikon
; plastic mold making,
finishing: HK modelltech, 4056 Basel
; impeller engines: Schubeler,
33175 Bad Lippspringe, GER


TEAM MANAGER "THIS" BOSSHARD
 Rodito Nussbaumer

SUMMER FUN 2026 AT MG USTER
Martin Wunderli
52. 2026 ALPS CUP
 Emil Giezendanner

ATOM, THE NEW DOUBLE-DECKER FROM CPLR
 Matthias Bosshard

INSIGHTS INTO THE HISTORY OF SEAPLANES

34th HAHNENMOOS ALPINE MODEL AIRPLANE CAMP
Res Dauwalder
CORSAIR F4U – A WARBIRD WITH A MEMORABLE LOOK
Jürgen Rosenberger, Jürgen Prinz
SMALL, MODEL-LIKE SAILBOATS
Res Dauwalder
F3A EUROPEAN CHAMPIONSHIPS IN ST-MACAIRE, FRANCE
Matthias Bosshard
What's New at Leomotion.com

HORIZON HOBBY/LEMACO NEWS: MICRO OV-10 BRONCO 645 MM BY E-FLITE

PRIDE AND GOOD IDEAS
 Markus Nussbaumer

News from HEBU

BY YOUTH, FOR YOUTH
Lorena Betschen
YOU KNOW WHAT I MEAN? 125 YEARS OF THE SWISS AERO CLUB
Emil Giezendanner
TRY-OUT DAY AT MFV WETTINGEN
Urs Keller
FREE FLIGHT IN THE MIDDLE OF SUMMER
Urs Muntwyler
THE PC-21 STORY
Emil Giezendanner
TWIN TOWN PARTNERSHIP
Wolfgang Voeller
EURO CONTEST GLIDER ACRO TOUR AUSTRIA 2026

WELCOME, NEW MEMBER!
Andrea Bolliger
COUPE DES ALPES – OBSERVE AND LEARN
Rodito Nussbaumer
NEWS FROM HEBU
 Julia Bucher

FROM 0 TO 100
Markus Nussbaumer
NOS REGION – A HUB FOR ELECTRIC AVIATION
Emil Giezendanner
MEMORIES
Wolfgang Völler
Have you almost forgotten about aircraft that take off and land vertically?
Emil Giezendanner
70 YEARS OF THE NIDWALDEN MODEL AIRPLANE CLUB
Martin Barmettler